Building
Building is the process of turning your Unity project into an application. Building creates a standalone application that others can interact with without using the Unity game engine.
As a note, we will be building Windows games with this class so that they can be played on the lab computers. If you are using a mac you will need to take additional steps that will be listed in this tutorial.
Checking Your Scenes
The first thing you should do when building is to check that all of the scenes your want to be within you application are listed within your Build Profiles. You can navigate to your build profiles by navigating to File > Build Profiles. In this window you can see your Scene List. Make sure all the scenes you would like to be in your build are included within the list.
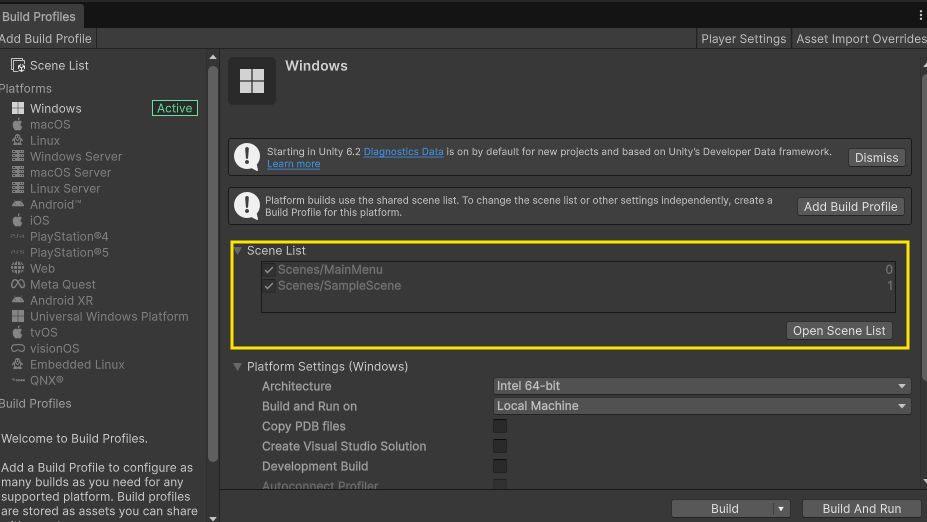
In our Build Profiles, we can also check if we have the Windows platform installed. In the above image you can see that Windows is selected on the left panel. If windows is not available, you will need to install the module from the Build Profiles window. You will then need to restart Unity to have that module available within the editor.
Player Settings
As an optional step, you can navigate to Player Settings to customize your game application. You can navigate to Player Settings from the upper right corner of the Build Profiles window or by navigating to Edit > Project Settings and then navigate to Player within the side panel
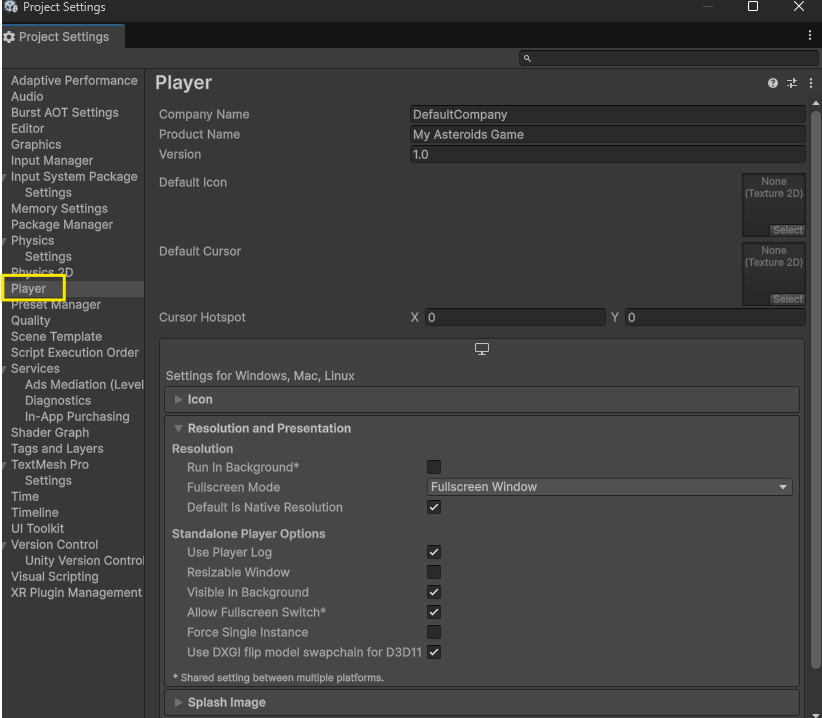
Within Player settings, you can adjust a variety of settings. Some example settings:
- Product Name: the name of your application
- Icon: The icon of your application
- Fullscreen Mode: Alter whether your game is played full screen or windowed.
Building Windows Game
Once you have adjusted your player settings, you can build your game by navigating back to the Build Profiles menu. You can then press the Build button:
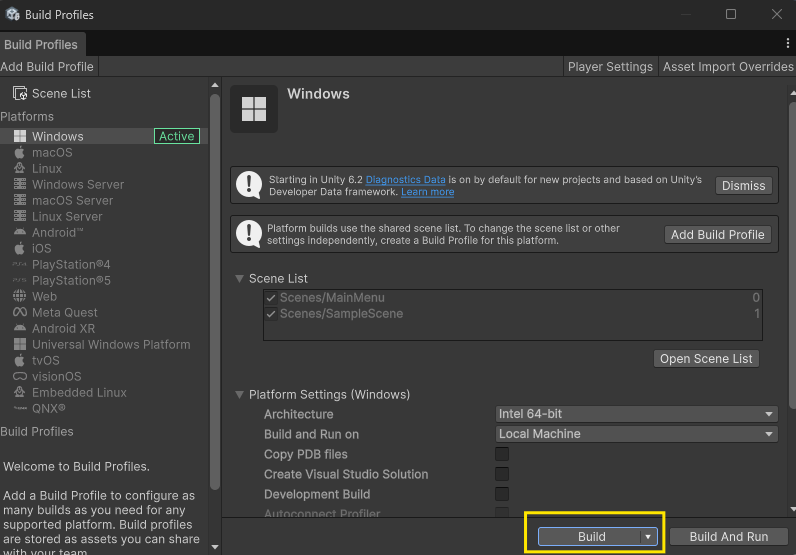
Once you select Build, you will be prompted to select a folder for your build. It is recommended that you create a new folder for your game build such as Asteroid_Build.
Once your select you folder, your project will begin building. As a note, your project will not build if you code contains errors. Additionally your project will stop building if Unity encounters any errors when compiling.
Common Error: Nonexistent Namespaces
A common error that you will see at runtime is a namespace does not exist error. Because newer versions of VS Code and VS Community auto add in namespaces when you add a type to your code, this can result in the inclusion of namespaces that do not exist or are depreciated. As a result, you will often see a build fail due to a compiler error with a nonexistent namespace.
For example, in this project, you might see an error such as this in your console:
Assets\Scripts\Asteroid.cs(1,19): error CS0234: The type or namespace name 'ShaderGraph' does not exist in the namespace 'UnityEditor' (are you missing an assembly reference?)

To solve this error, you only need to remove the nonexistent namespace for your C# file. In this example, we need to remove the namespace “ShaderGraph”, which does not exist currently within our Unity project.
Build Folder
Once our project has built, we will see a number of items in our build folder.
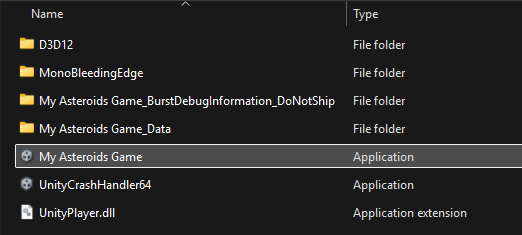
The most important file in this folder is the Application (.exe) file type that is named after your Project or Product name. This is your game application launch file. Double clicking on this file will open your game.
As a note, to share your game, you need to share this entire folder with all of it’s contents. You can do this by compressing this folder and sharing the zipped file folder. You will need to upload a zipped folder of a Windows build for all projects in this course.