Prefabs, Instantiation, and Destroy
In this tutorial we will learn how to fire projectiles from our spacecraft. In doing so, we will learn about Prefabs as well as how to create and destroy objects during runtime.
Creating Projectile
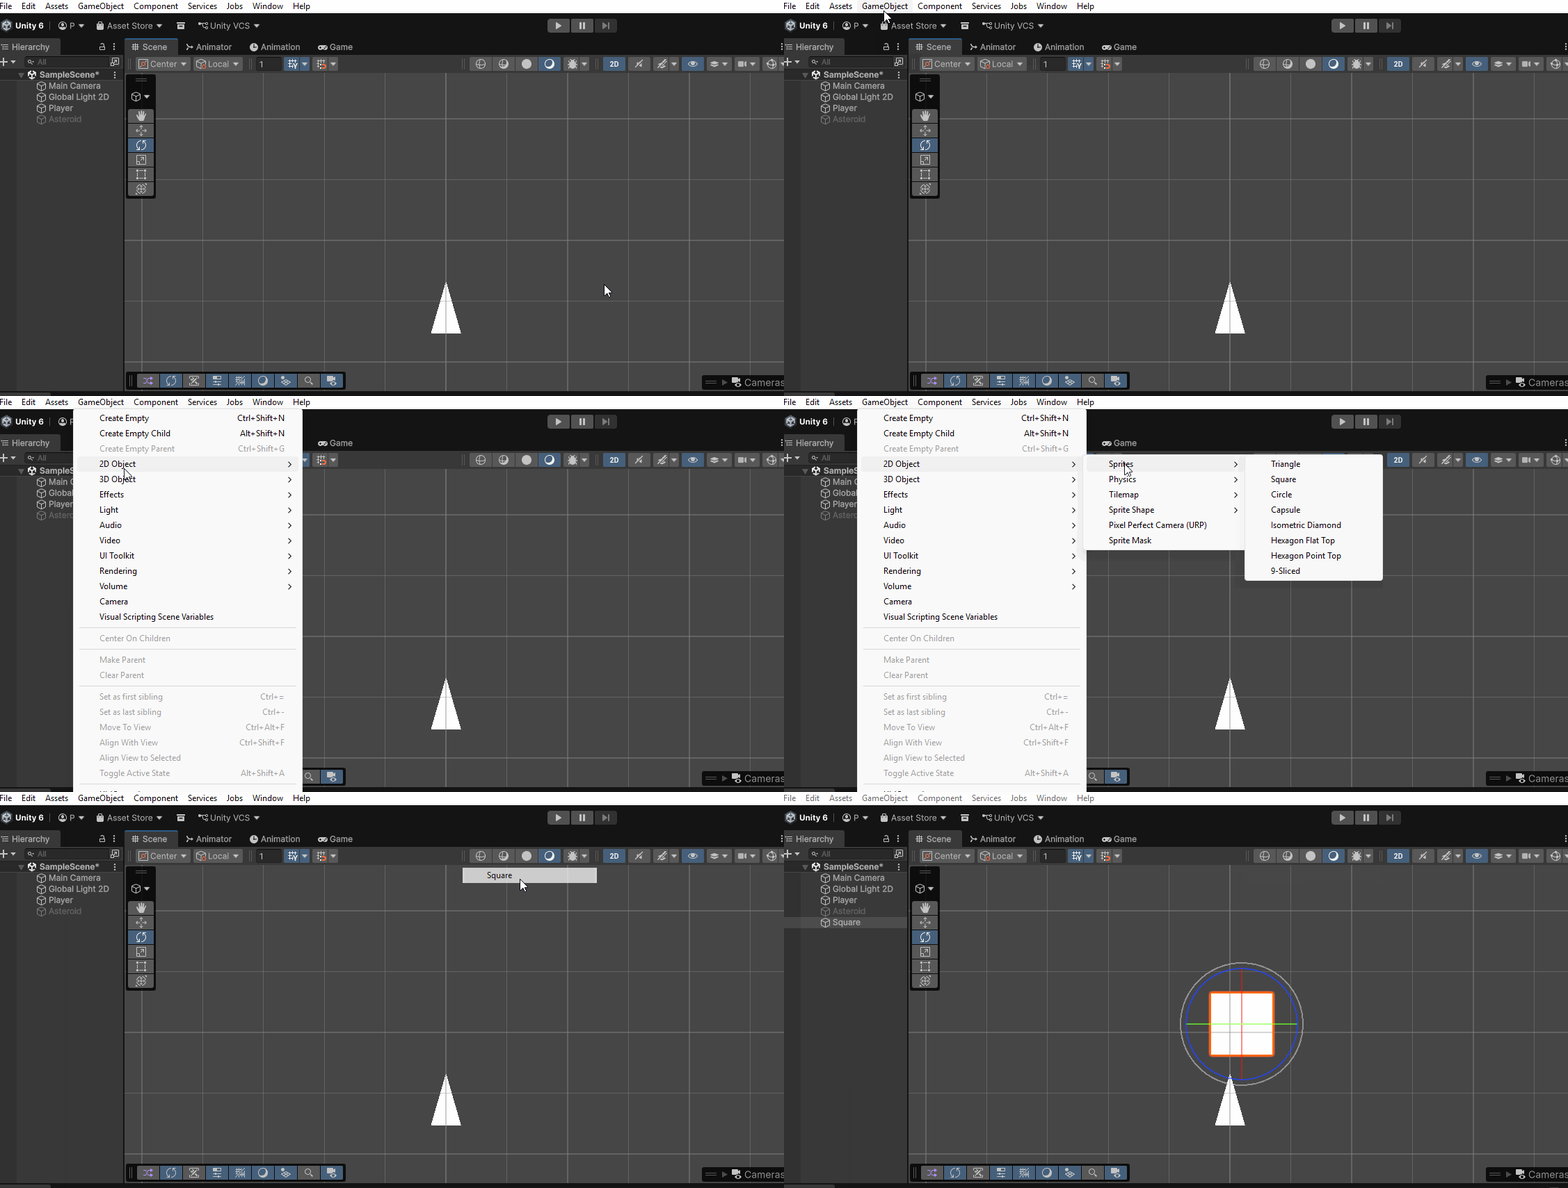
To create a projectile begin by creating a Square game object.
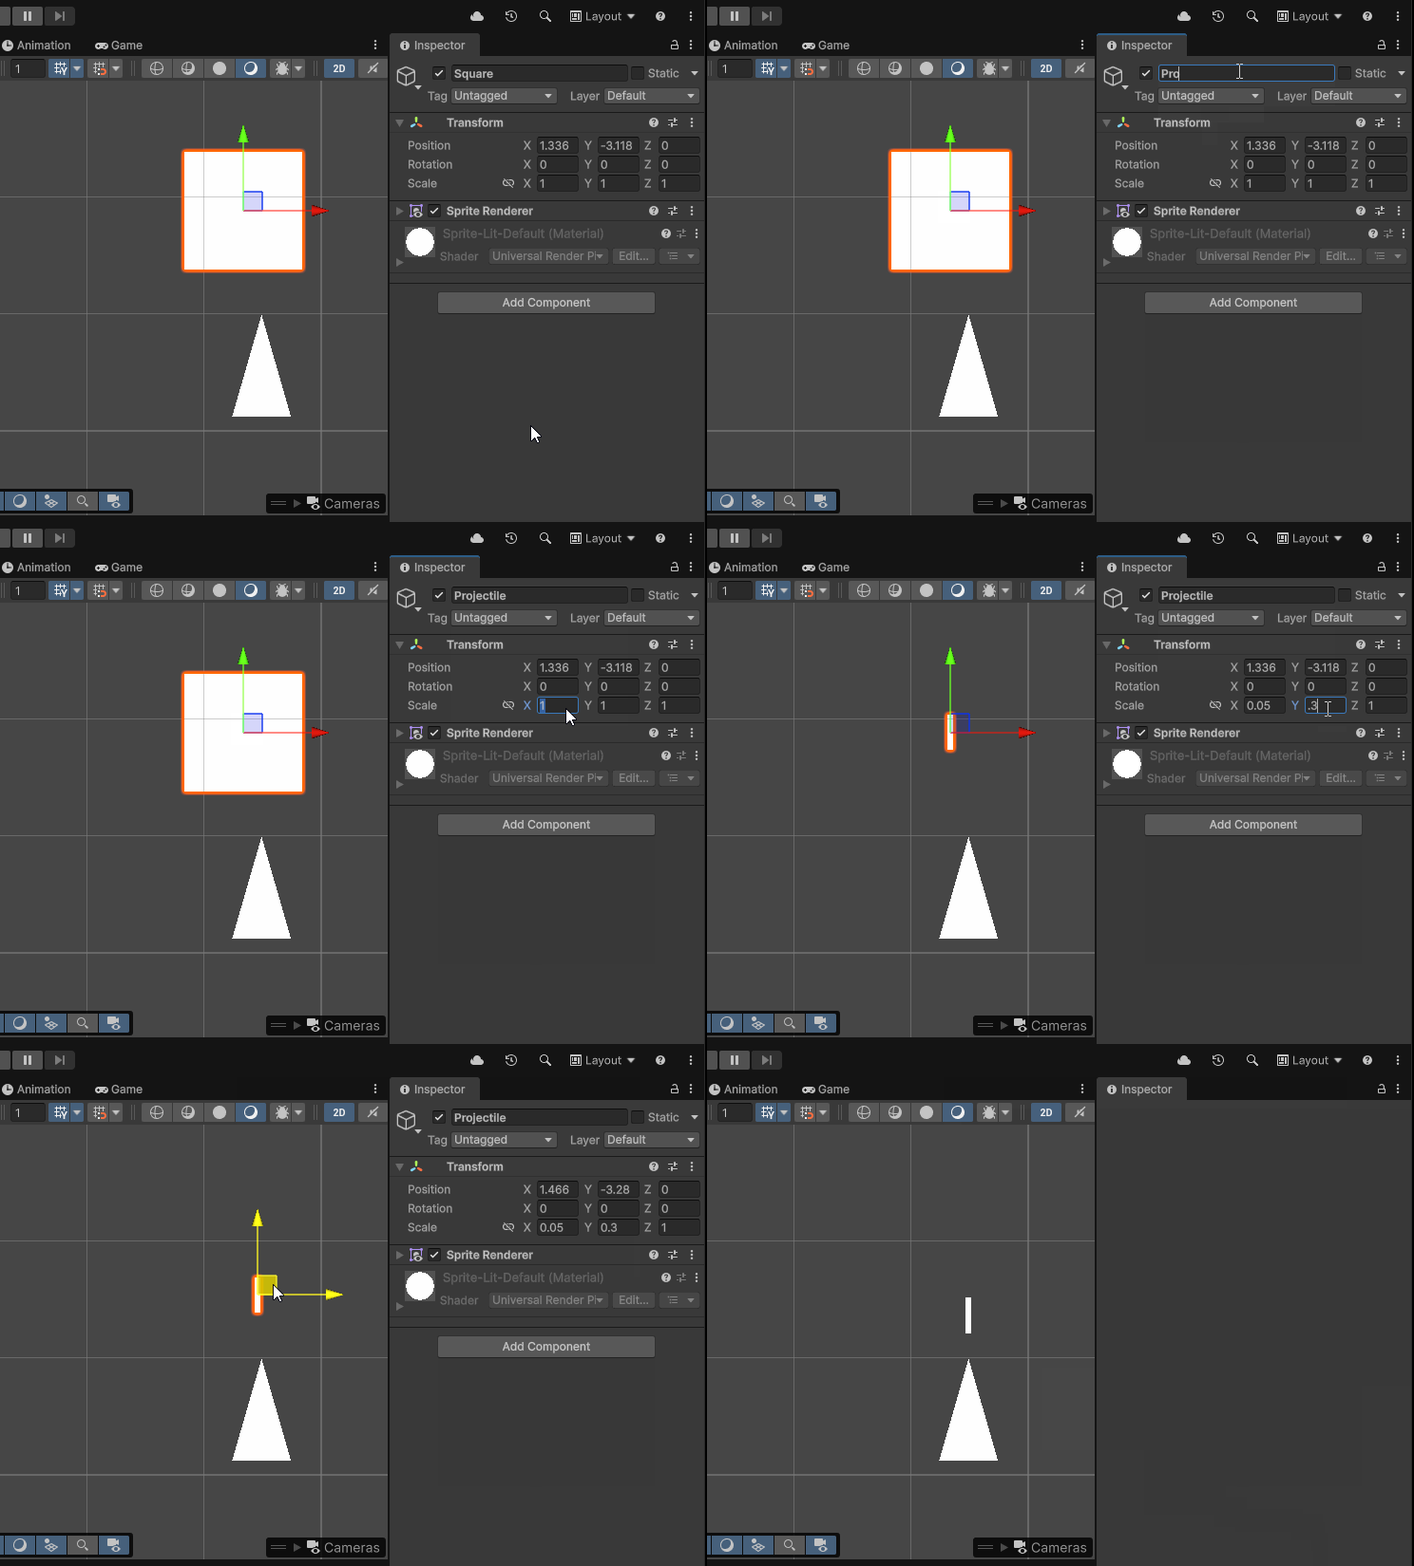
Then rename it to Projectile and scale it down to around (.05, .3, 1)
Moving Projectile
To move our projectile, let’s use the AddForce() method with a rigid body.
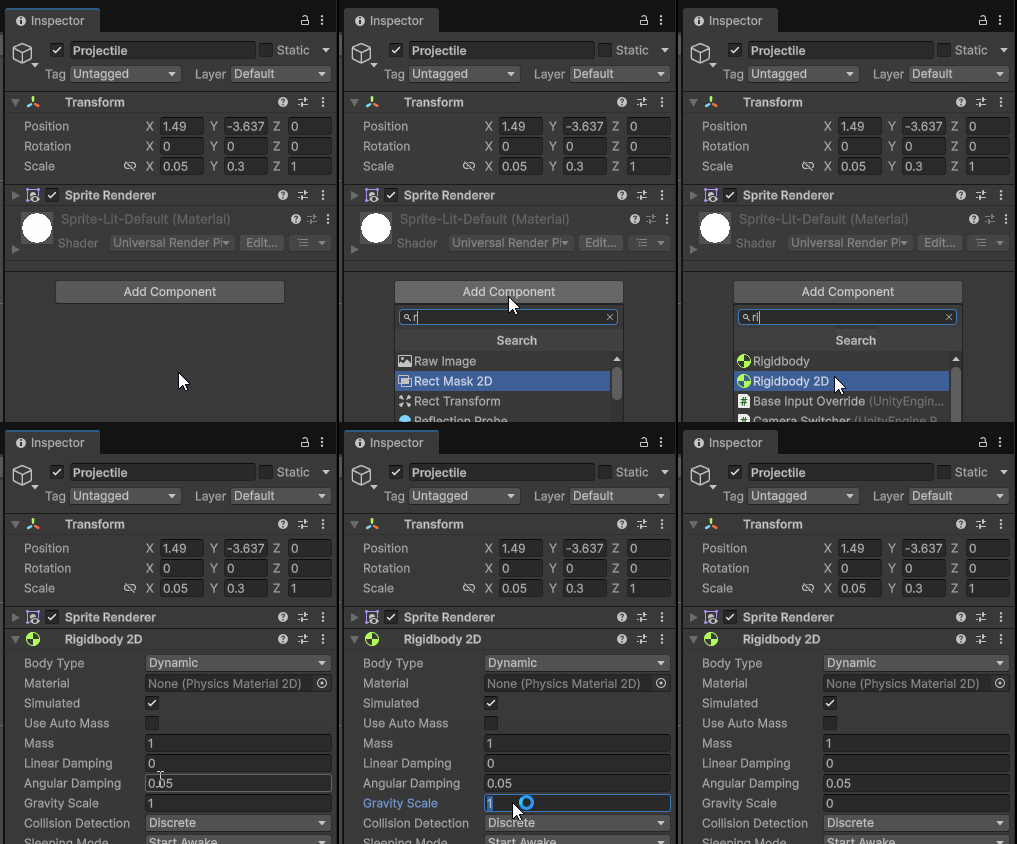
Begin by adding a Rigidbody2D component to your projectile and setting the Gravity Scale to 0
Create a Projectile MonoBehavior script and add it to our Projectile game object
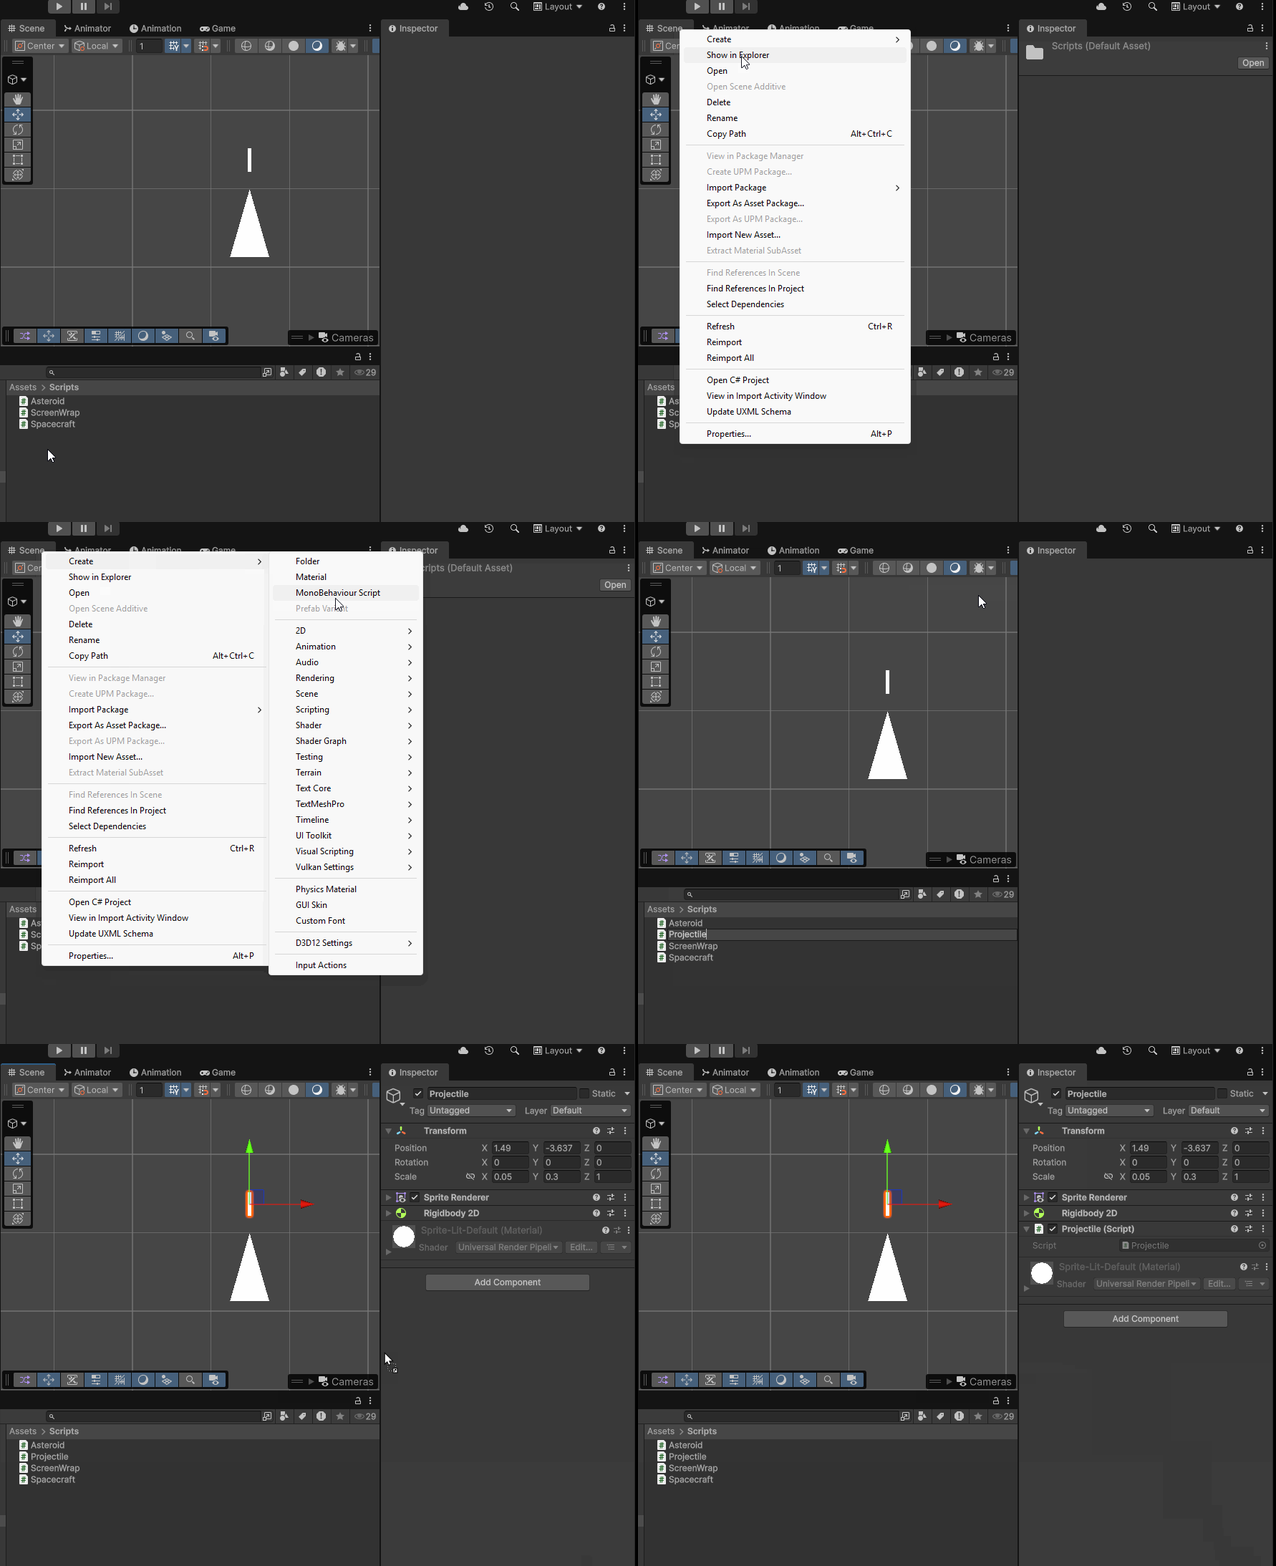
Open the script and add the following variables:
Rigidbody2D rBody;
public float speed = 15f;
bool forcedAdded = false;
To move our rigid body, let’s first get the component in Start()
void Start()
{
    rBody = GetComponent<Rigidbody2D>();
}
Then add a force to our rigid body in the up direction of the projectile’s transform
void FixedUpdate()
{
    rBody.AddForce(transform.up * speed, ForceMode2D.Impulse);
}
In order to trigger the AddForce() method only once, we will use a Boolean flag during the loop of FixedUpdate(). After adding an initial force we will set the bool variable forceAdded to true so no additional force will be added to our projectile.
void FixedUpdate()
{
    if(forcedAdded == false)
    {
        rBody.AddForce(transform.up * speed, ForceMode2D.Impulse);
        forcedAdded = true;
    }
}
Lastly, add the ScreenWrap component to the Projectile.
The Projectile game object and Projectile.cs file should look like this:
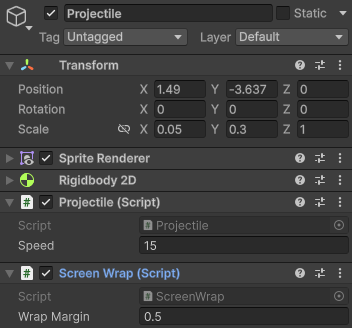
using UnityEngine;

public class Projectile : MonoBehaviour
{
    Rigidbody2D rBody;
    public float speed = 15f;
    bool forcedAdded = false;

    void Start()
    {
        rBody = GetComponent<Rigidbody2D>();
    }

    void Update()
    {

    }

    void FixedUpdate()
    {
        if (forcedAdded == false)
        {
            rBody.AddForce(transform.up * speed, ForceMode2D.Impulse);
            forcedAdded = true;
        }
    }
}
Playing our game, we notice our projectile moves indefinitely:
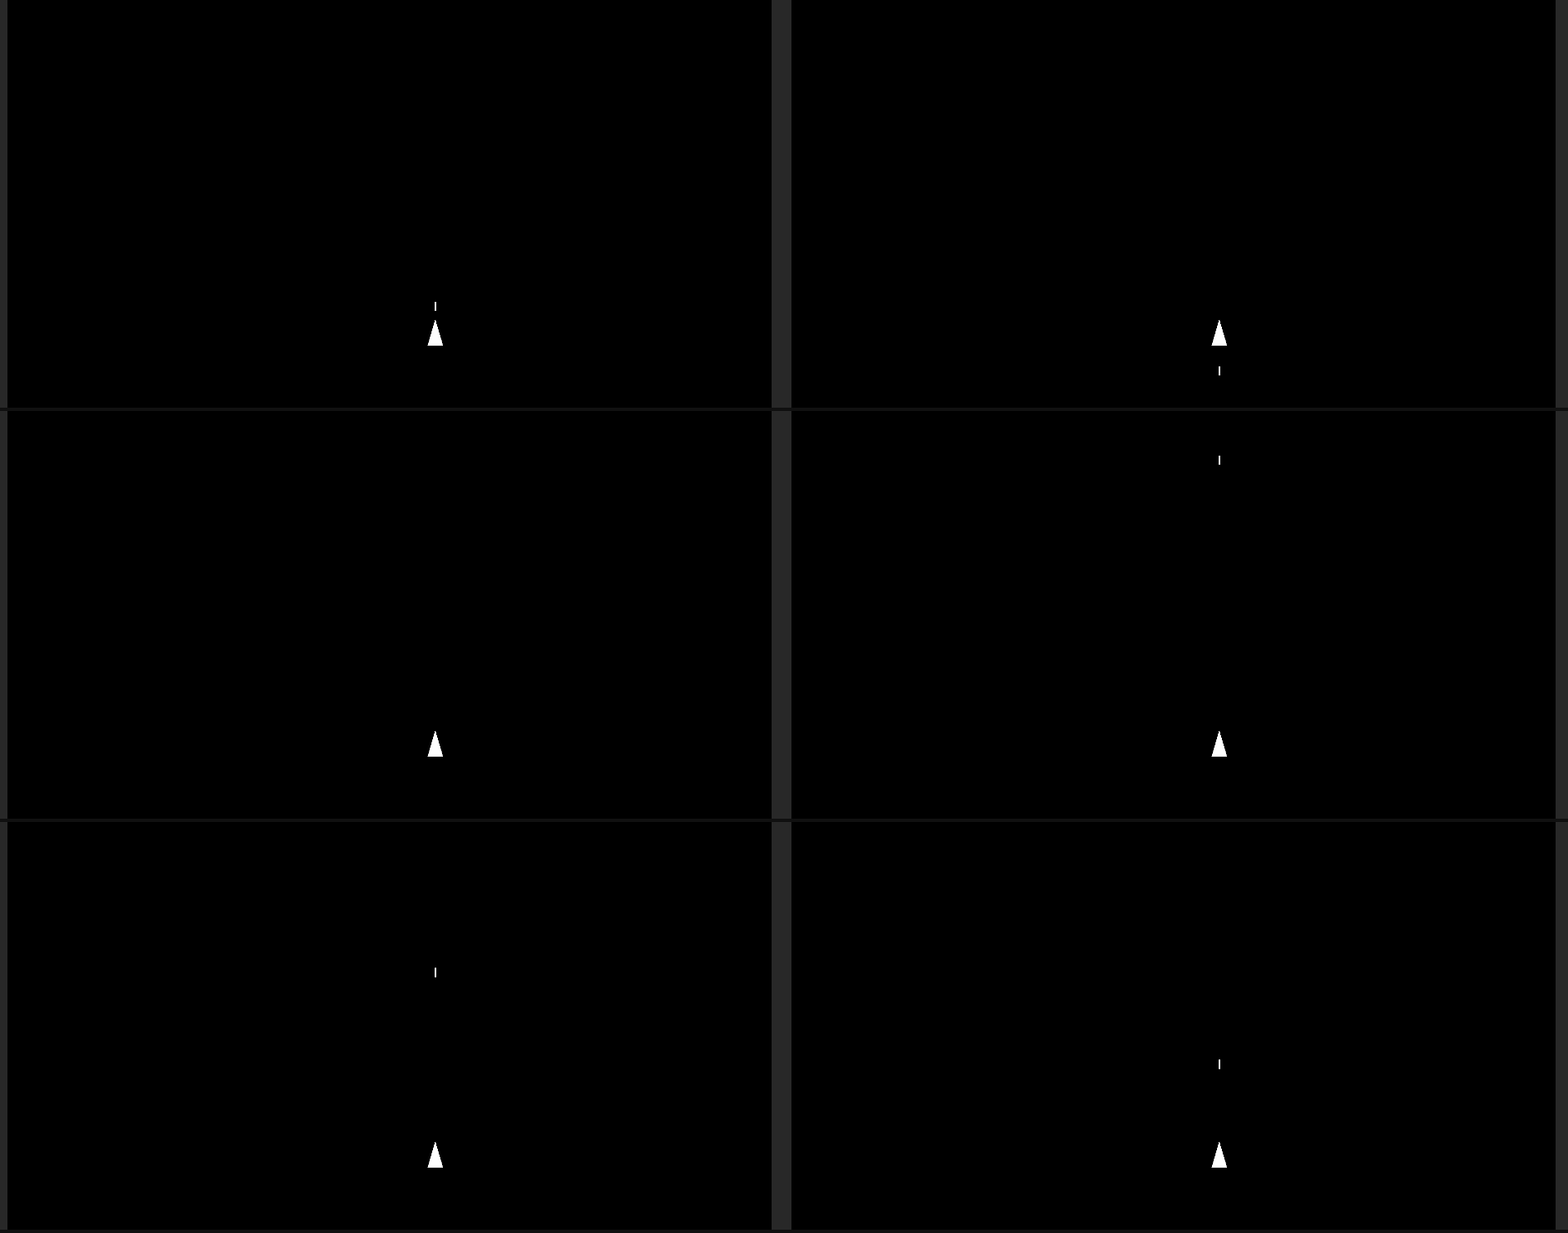
Lifetime Timer and Destroy
Currently, our projectile continues to move across our screen. Ideally, our projectile would move for a certain amount of time and then disappear. To accomplish this we can combine a timer with Unity’s Destroy() method (Unity Reference).
To create a timer in Unity, we can use a variable that holds the time we have remaining, and then subtract from this time each frame. We can use Time.deltaTime to subtract the time from the update loop.
public float lifetime = .5f;

void Update()
{
    lifetime -= Time.deltaTime;
}
Next, we can check when our lifetime is less than or equal to 0.
void Update()
{
    lifetime -= Time.deltaTime;

    if( lifetime <= 0)
    {

    }
}
If it is less than 0, we can use the Destroy() method. We can give a number of objects to Destroy() including components and game objects. In our case, we want to destroy the entire projectile, so we can give the method gameObject which will destroy the game object the component is attached to.
void Update()
{
    lifetime -= Time.deltaTime;

    if( lifetime <= 0)
    {
            Destroy(gameObject);
    }
}
Now the projectile will be destroyed after half a second
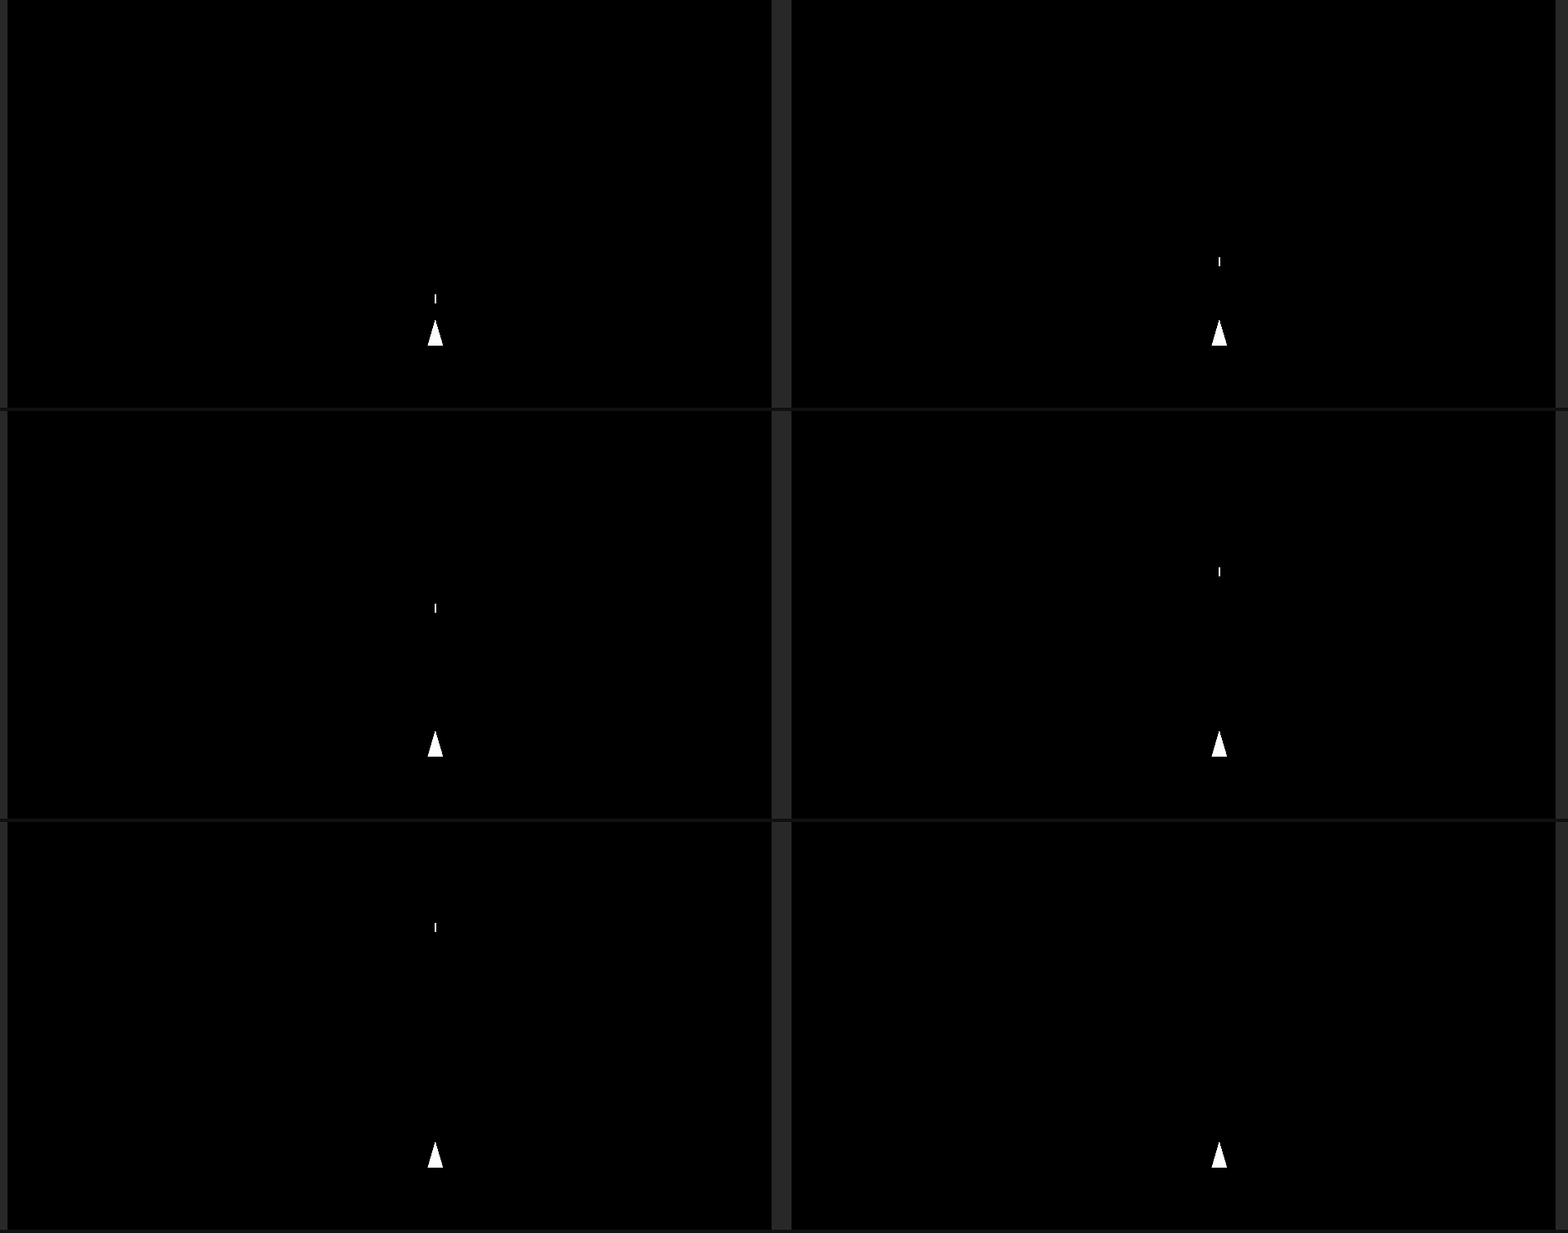
Instantiating Prefabs
Creating a Prefab
Now that we have a properly functioning projectile, lets rework our program so that we can spawn an infinite number of projectiles using a fire input button.
In order to create more projectiles, we need to continuously duplicate the single projectile we currently have. To do this, we need to turn our projectile into a Prefab. In Unity, a Prefab is essentially a game object blueprint that we can use to create exact copies from a template.
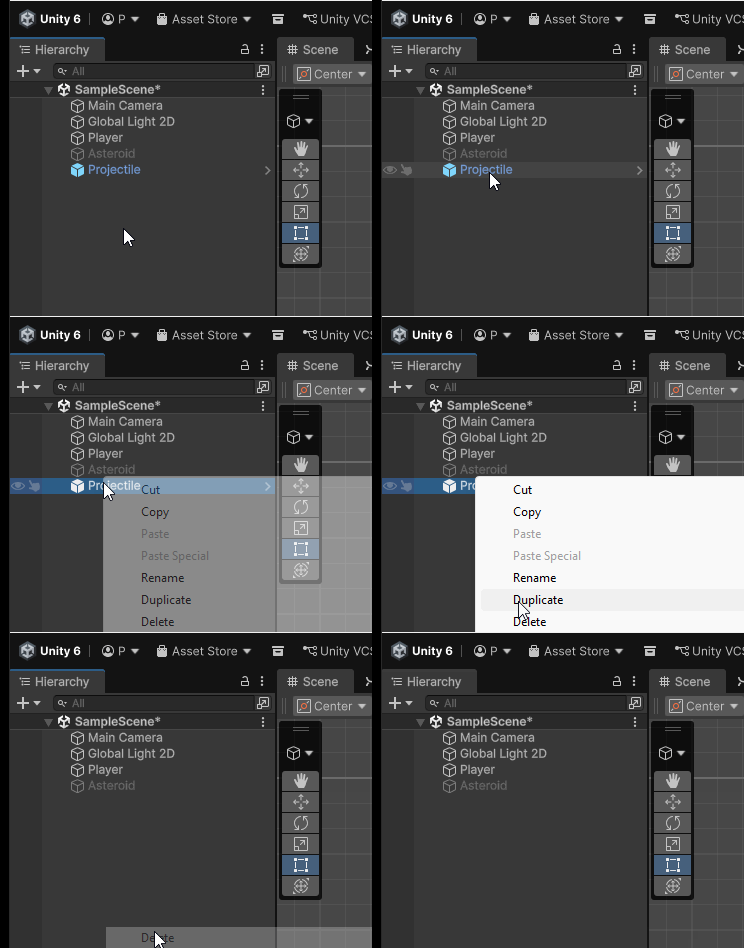
Creating a prefab is incredibly easy, the only thing we need to do is drag our game object from our Hierarchy to our Project window. For best practice, we can drag our game object into a folder named Prefabs to keep things organized.
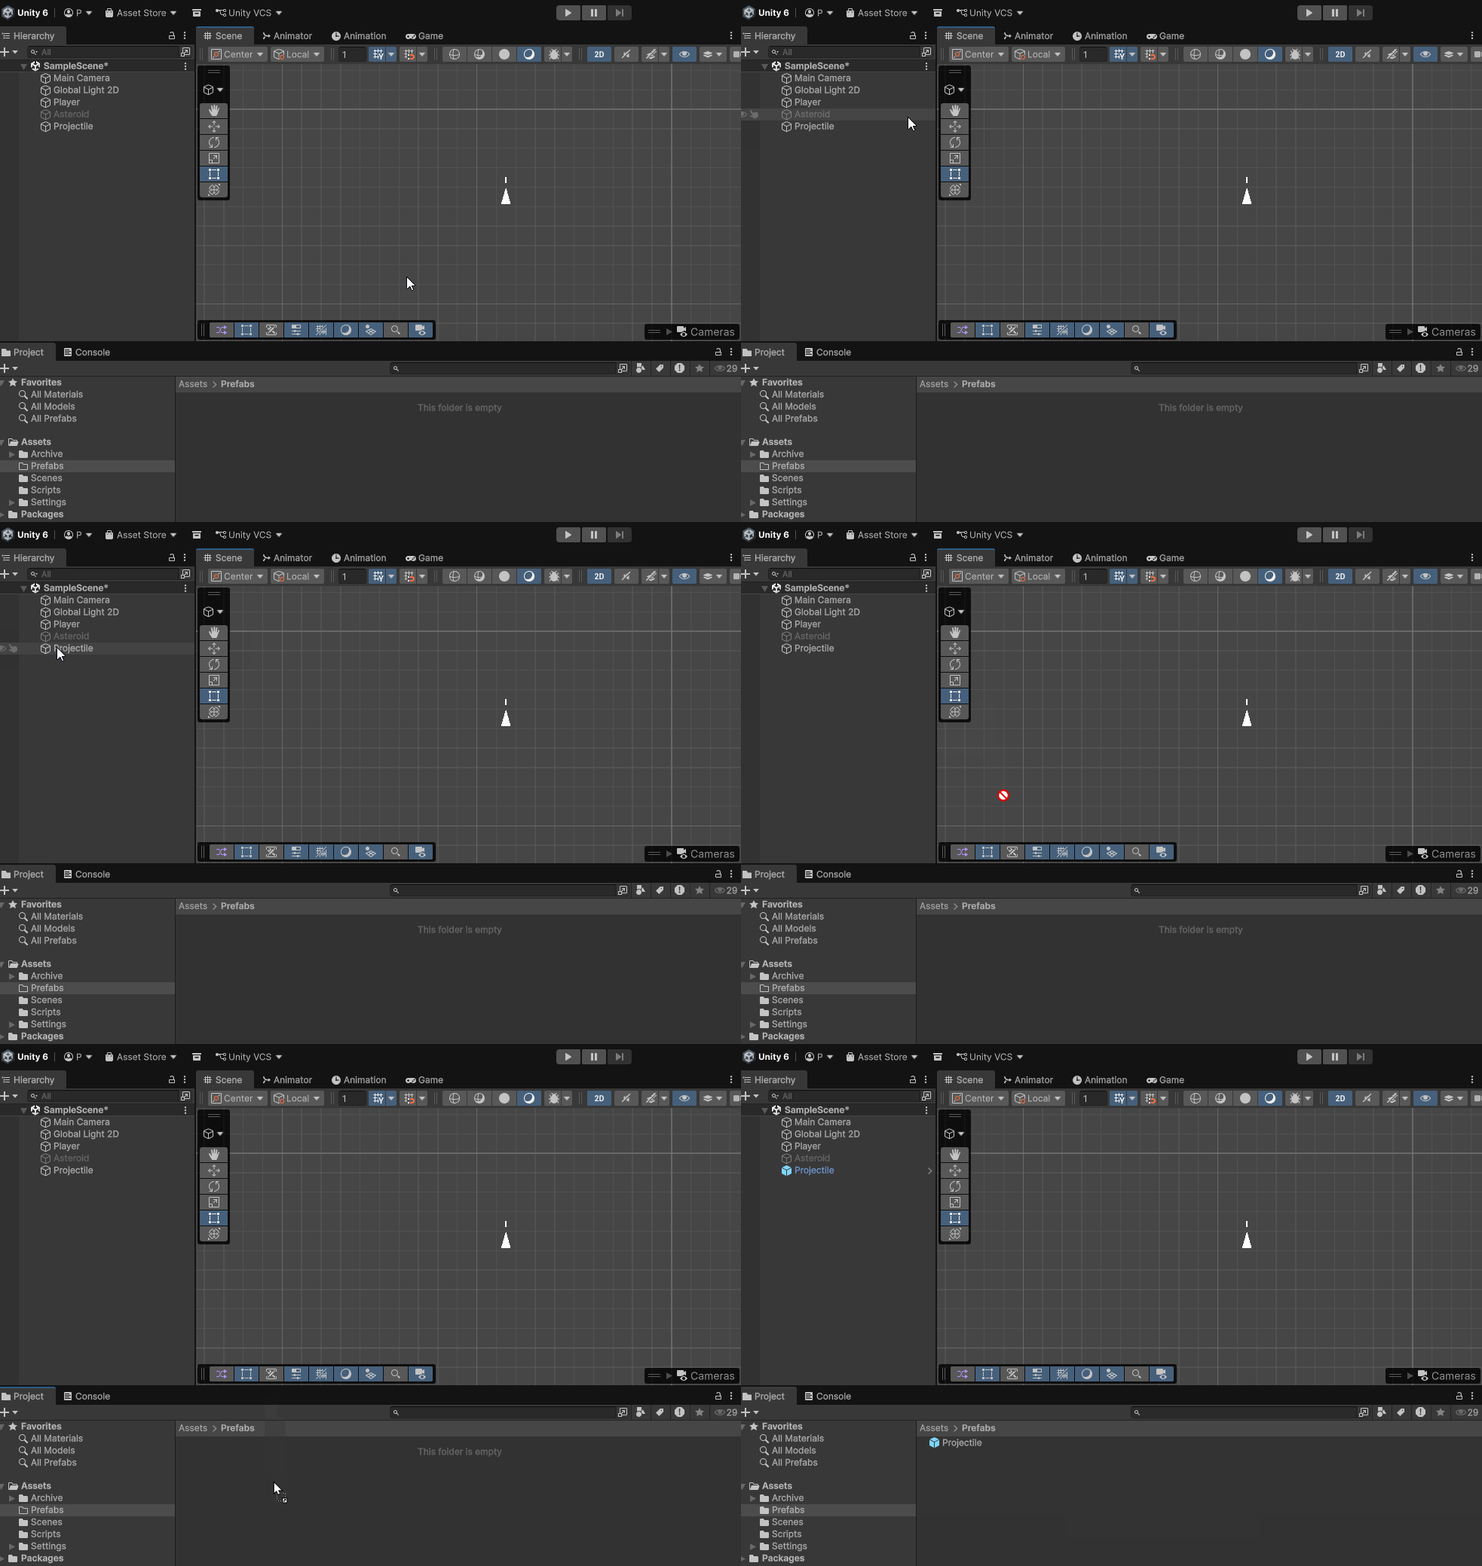
We’ll know when our object has become a prefab when the name of the game object becomes blue and the cube outline is replaced with a solid blue cube. Once we create the prefab object, we can delete the original.
Creating Fire Input Action
To fire our projectile we need to create and Input Action within our Spacecraft.cs file. To do this we will create a button.
Let’s begin by creating a public InputAction variable called fireAction in our Spacecraft.cs file.
public InputAction fireAction
Enable the disable the fireAction
private void OnEnable()
{
    moveAction.Enable();
    rotateAction.Enable();
    fireAction.Enable();
}

private void OnDisable()
{
    moveAction.Disable();
    rotateAction.Disable();
    fireAction.Disable();
}
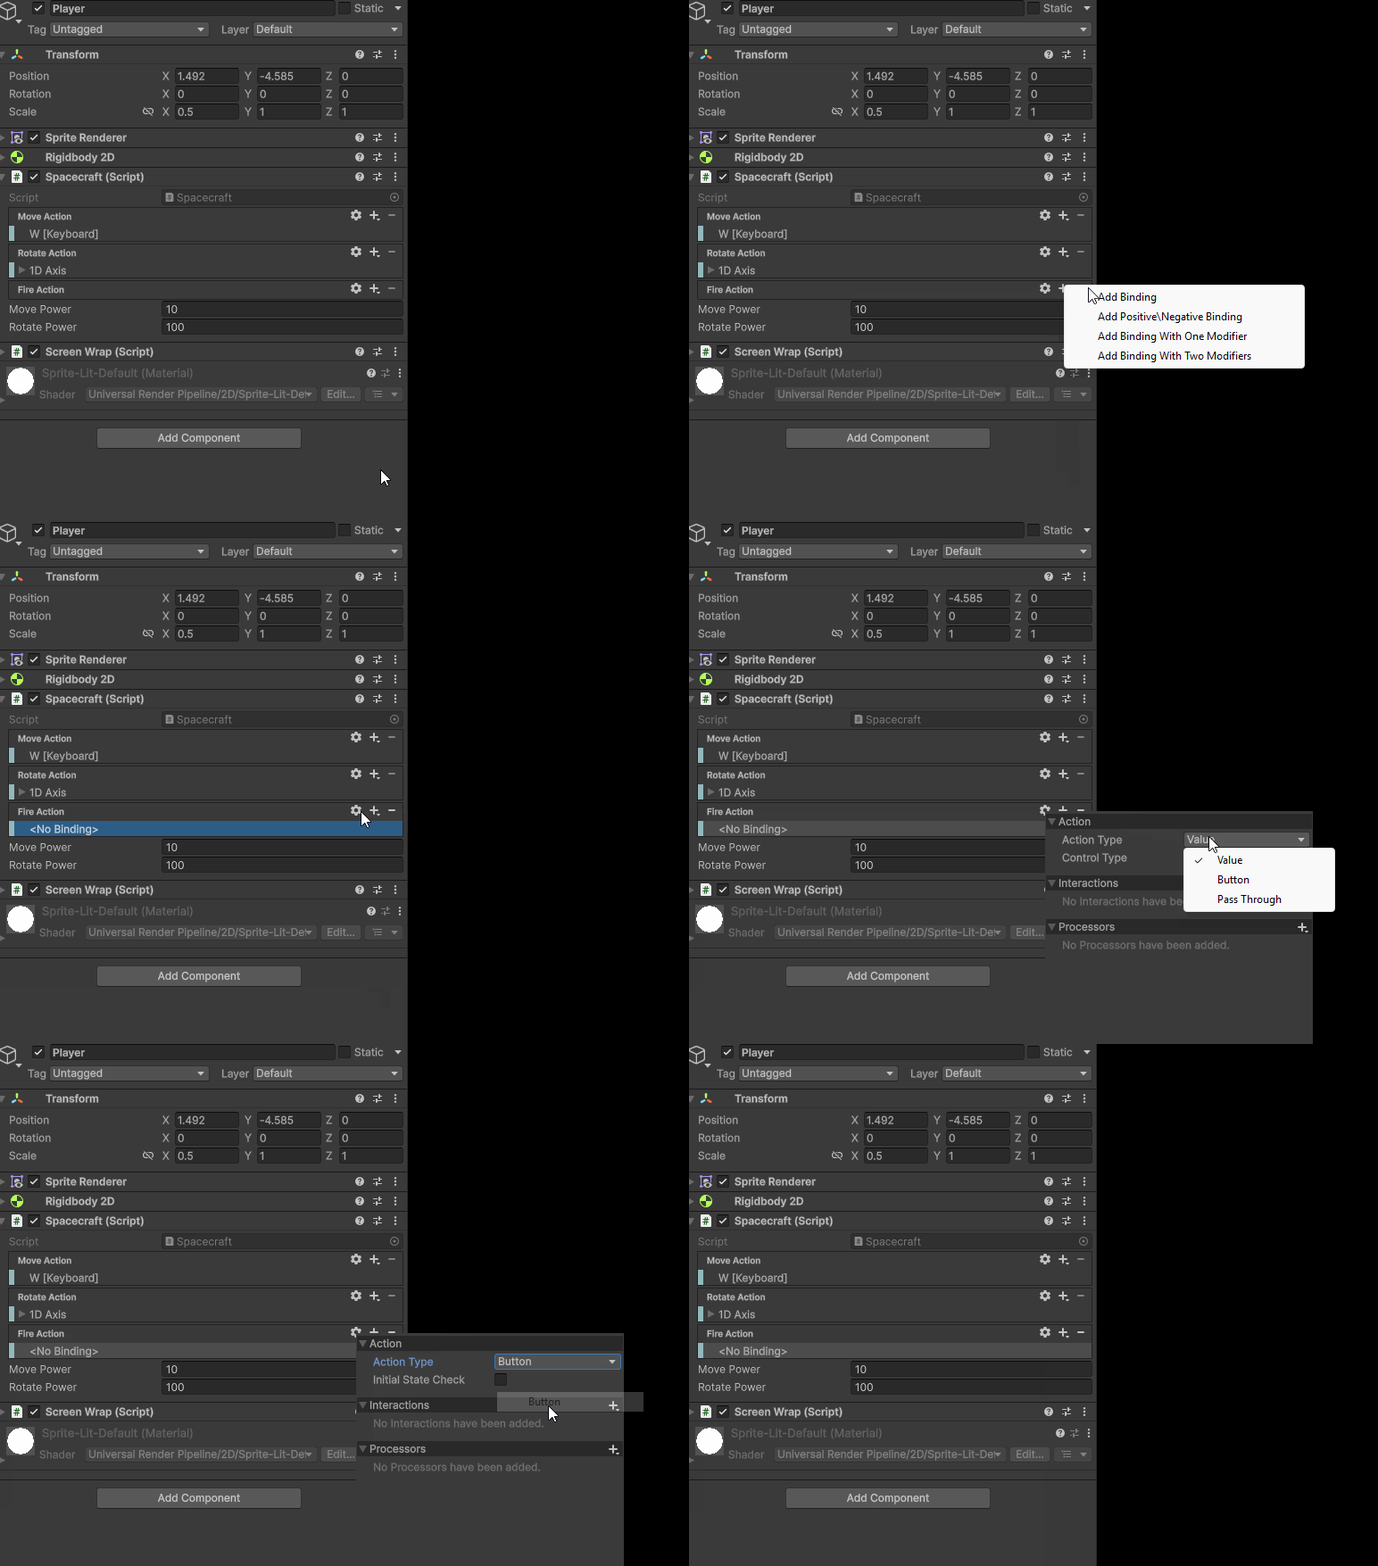
Within the Unity Editor, let’s create a binding for our Fire Action. We need to set this binding to be a button. To do that, we can press the gear icon and change the Action Type to Button.
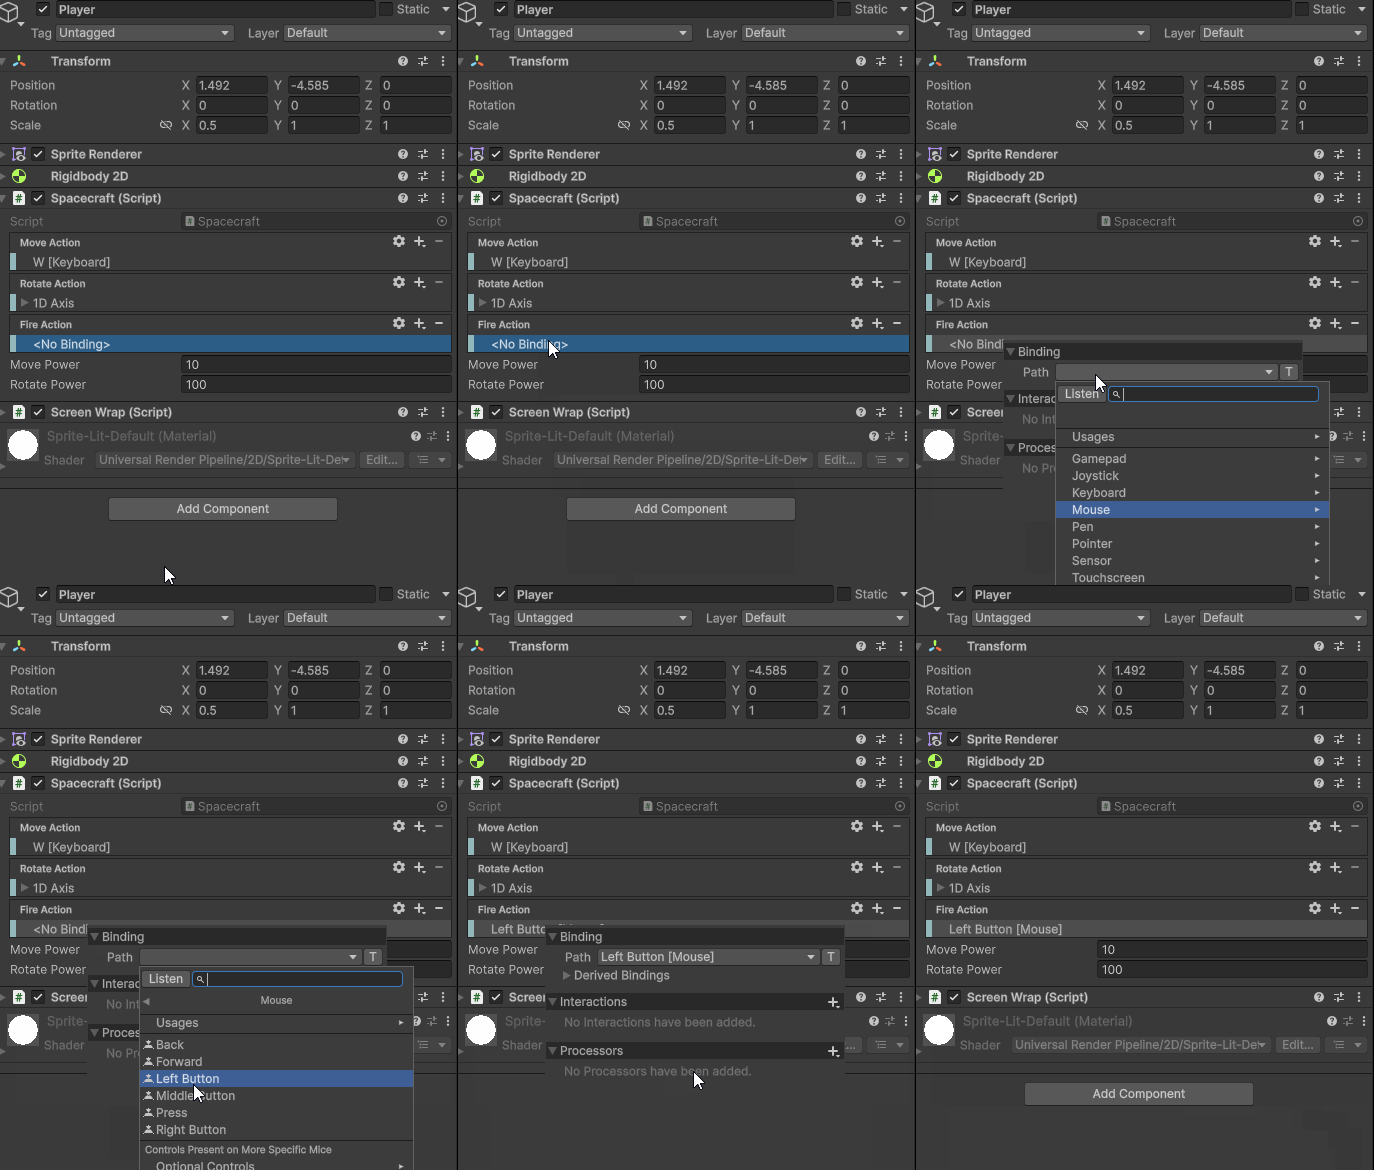
We can then set our binding to be our Left Mouse Button.
Prefab Variable
To fire our projectile from our Spacecraft script we need to create a public GameObject variable to store our Prefab.
public GameObject projectilePrefab;
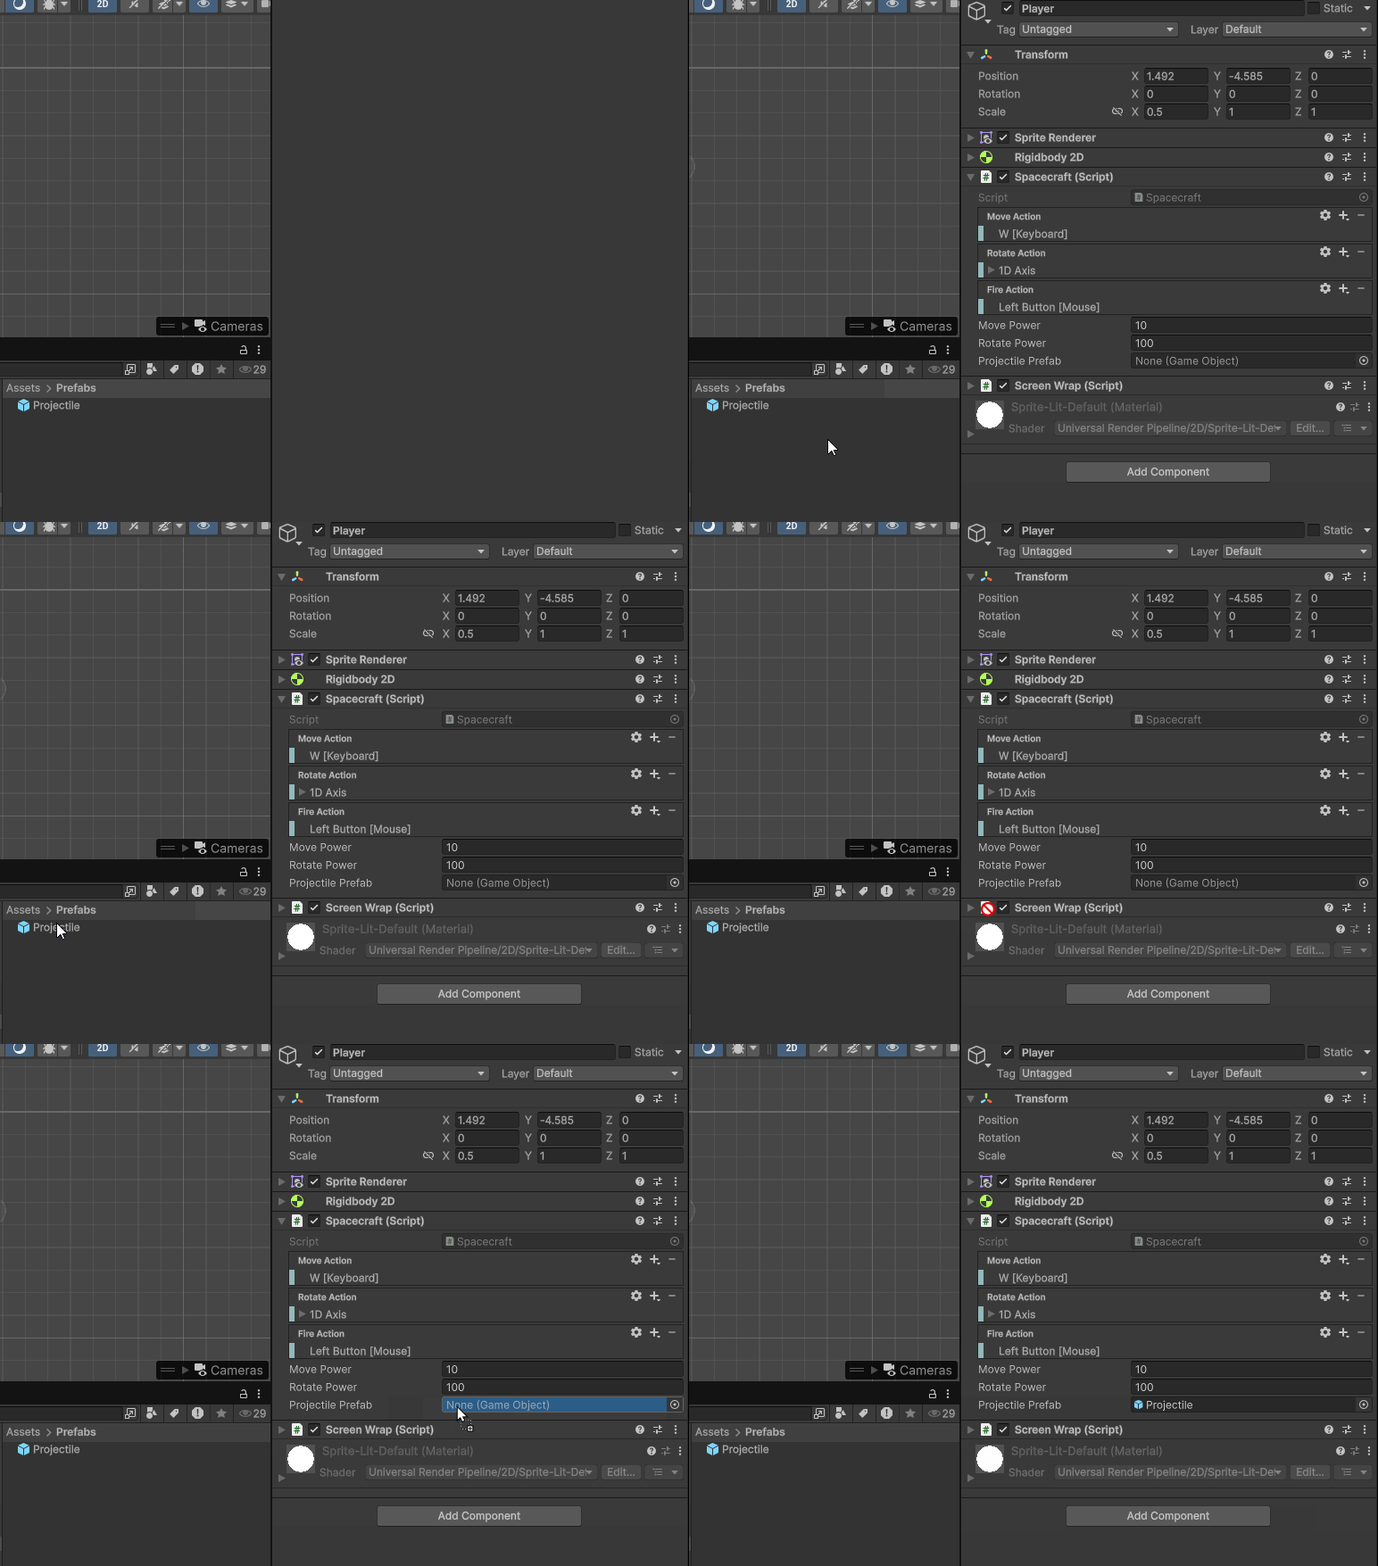
We can then drag our Prefab from our Project window to the open slot in the Spacecraft component on our Player.
triggered and Instantiate
Lastly, to fire our projectile, within our Update() method, we can use the bool value triggered on our fireAction to see if our Fire input has been pressed.
void Update()
{
    if (fireAction.triggered)
    {
        //Fire Projectile
    }
}
To create our projectile we can use the Instantiate() method which creates a new clone of the object we provide it. We can also set the position of the projectile to fired from slightly in front of our Player by using an offset variable. Additionally, we will set the rotation of our projectile to match the rotation of our Spacecraft.
public float projectileOffset = .8f;

///...

void Update()
{

    if (fireAction.triggered)
    {
        Vector3 projectilePosition = transform.position + transform.up * projectileOffset;
        Instantiate(projectilePrefab, projectilePosition, transform.rotation);
    }
}
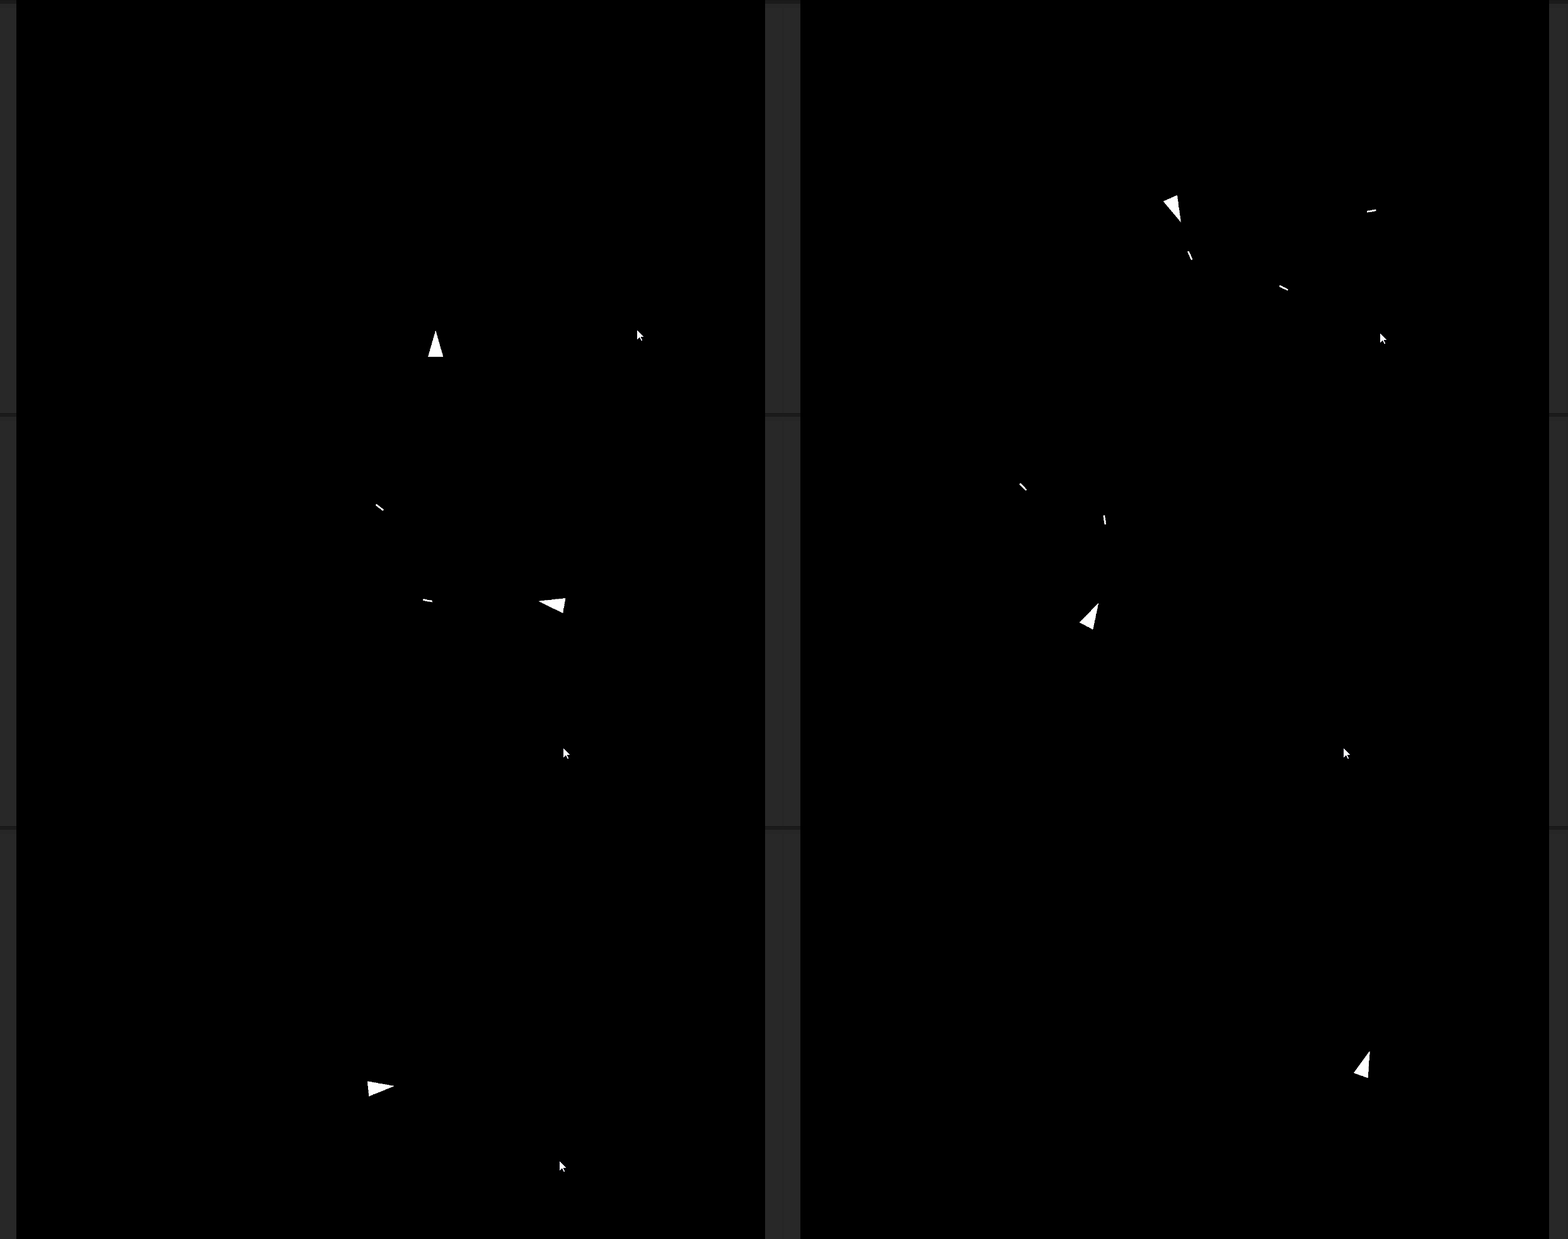
Our code for our Projectile.cs and our Spacecraft.cs should look like the following
using UnityEngine;
using UnityEngine.InputSystem;

public class Spacecraft : MonoBehaviour
{
    public InputAction moveAction;
    public InputAction rotateAction;
    public InputAction fireAction;
    float moveInput;
    float rotateInput;
    Rigidbody2D rBody;
    public float movePower = 15f;
    public float rotatePower = 200f;
    public float projectileOffset = .8f;

    public GameObject projectilePrefab;

    private void OnEnable()
    {
        moveAction.Enable();
        rotateAction.Enable();
        fireAction.Enable();
    }

    private void OnDisable()
    {
        moveAction.Disable();
        rotateAction.Disable();
        fireAction.Disable();
    }

    void Start()
    {
        rBody = GetComponent<Rigidbody2D>();
    }

    void Update()
    {
        if (fireAction.triggered)
        {
            Vector3 projectilePosition = transform.position + transform.up * projectileOffset;
            Instantiate(projectilePrefab, projectilePosition, transform.rotation);
        }
    }

    void FixedUpdate()
    {
        moveInput = moveAction.ReadValue<float>();
        rotateInput = rotateAction.ReadValue<float>();

        Vector2 moveForce = transform.up * moveInput * movePower * Time.fixedDeltaTime;
        rBody.AddForce(moveForce, ForceMode2D.Impulse);

        float newRotation = rBody.rotation + rotateInput * rotatePower * Time.fixedDeltaTime;
        rBody.MoveRotation(newRotation);
    }
}
using UnityEngine;

public class Projectile : MonoBehaviour
{
    Rigidbody2D rBody;
    public float speed = 15f;
    bool forcedAdded = false;
    public float lifetime = .5f;

    void Start()
    {
        rBody = GetComponent<Rigidbody2D>();
    }

    void Update()
    {
        lifetime -= Time.deltaTime;

        if( lifetime <= 0)
        {
            Destroy(gameObject);
        }
    }

    void FixedUpdate()
    {
        if (forcedAdded == false)
        {
            rBody.AddForce(transform.up * speed, ForceMode2D.Impulse);
            forcedAdded = true;
        }
    }
}