Fonts
In this tutorial we will learn how to import fonts into Unity and apply those fonts to Text Mesh Pro components.
Finding a Font
Unity supports a variety of font files including TrueType Fonts (.ttf) and OpenType Fonts (.otf). To bring a font into Unity for your project, the first step is to find a font that you would want to use. There are a variety of free font resources online including:
Google Fonts Libre Foundries (A list of of libre typefaces) Dafont.com
When you find a font that you like, make sure you can download a typeface file type that works with Unity. This will most commonly be a .ttf or .otf file. For example, you can freely download the typeface Press Start 2P from Google Fonts. The downloadable folder will contain a .ttf file.
Importing Fonts
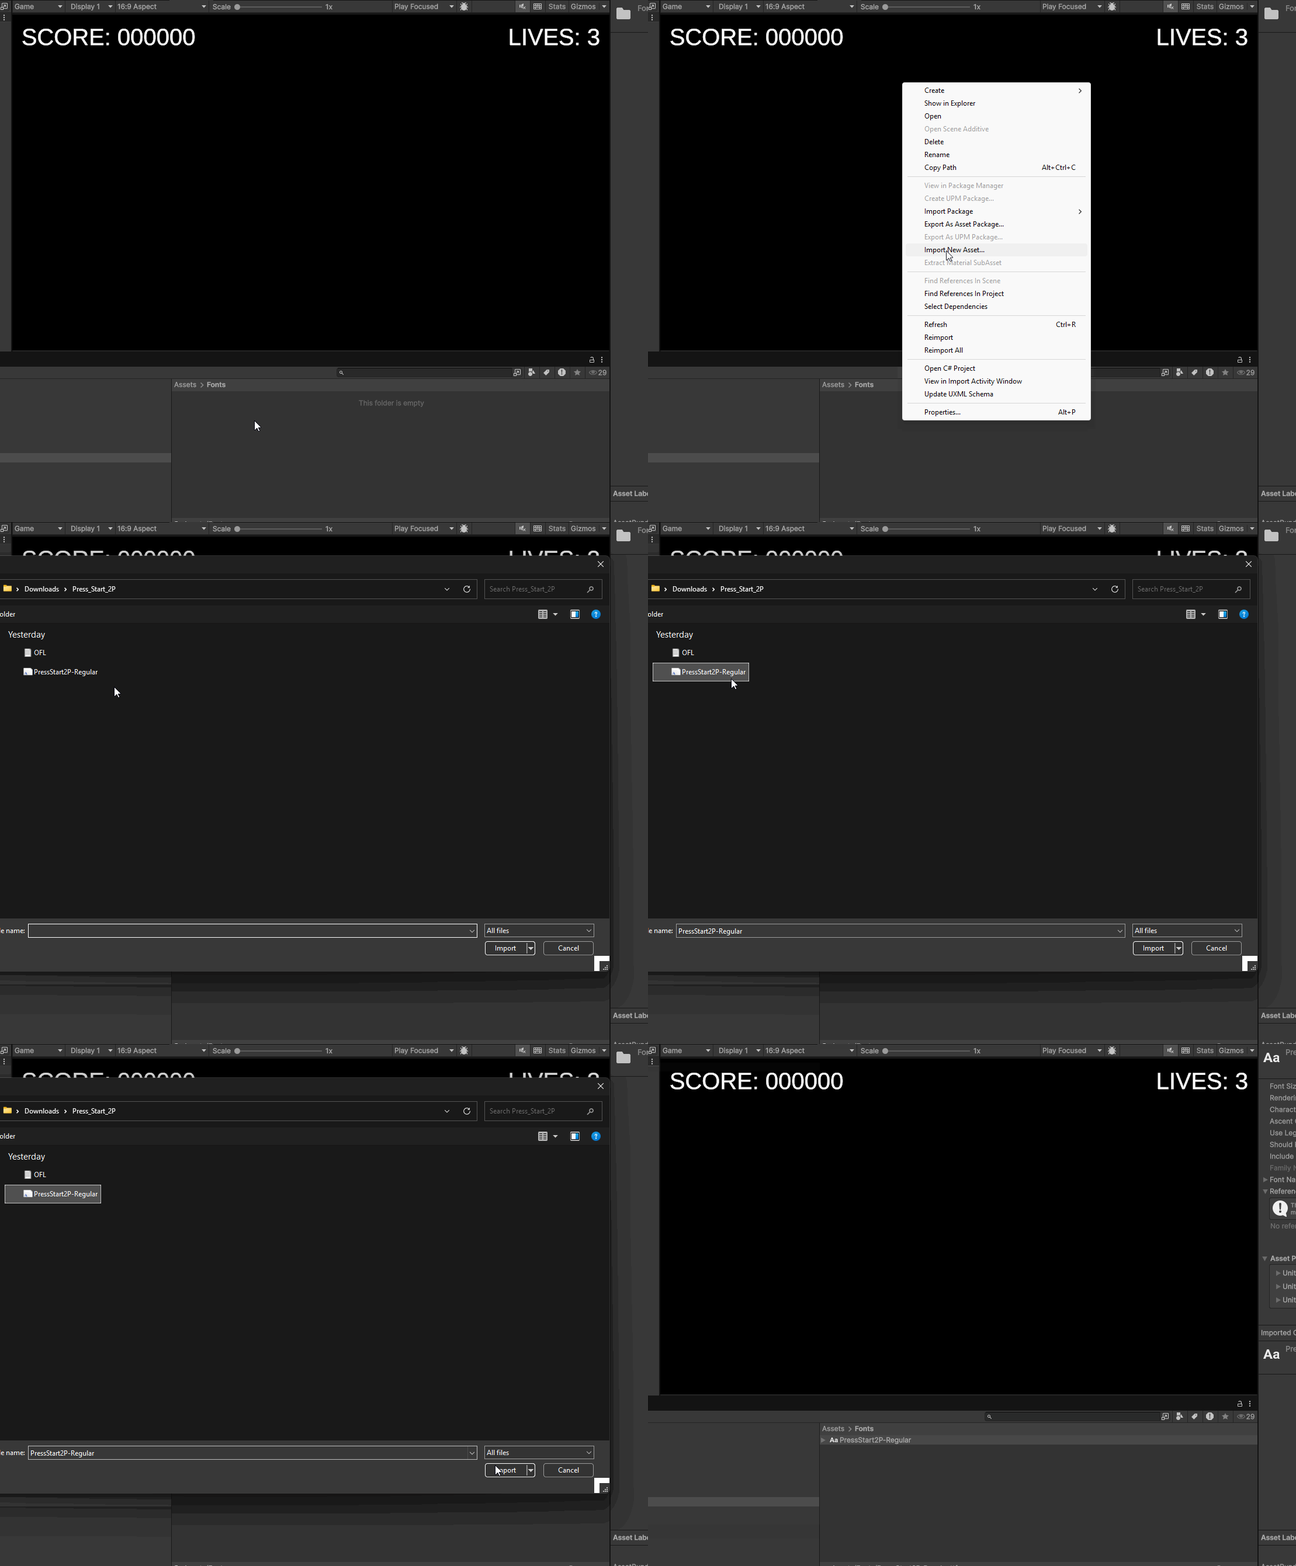
To import a font into your Unity scene, you can Right Click into your Project window and navigate to Import New Asset and then the file you want to import. You can also directly drag and drop files into your assets folder. I’ve downloaded the Press Start 2P typeface from Google Fonts. I can bring the .ttf file into my project:
Creating Font Assets
Once we have our font in our Unity scene, to use this font with our Text Mesh Pro components, we need to use the imported font to create a Font Asset.
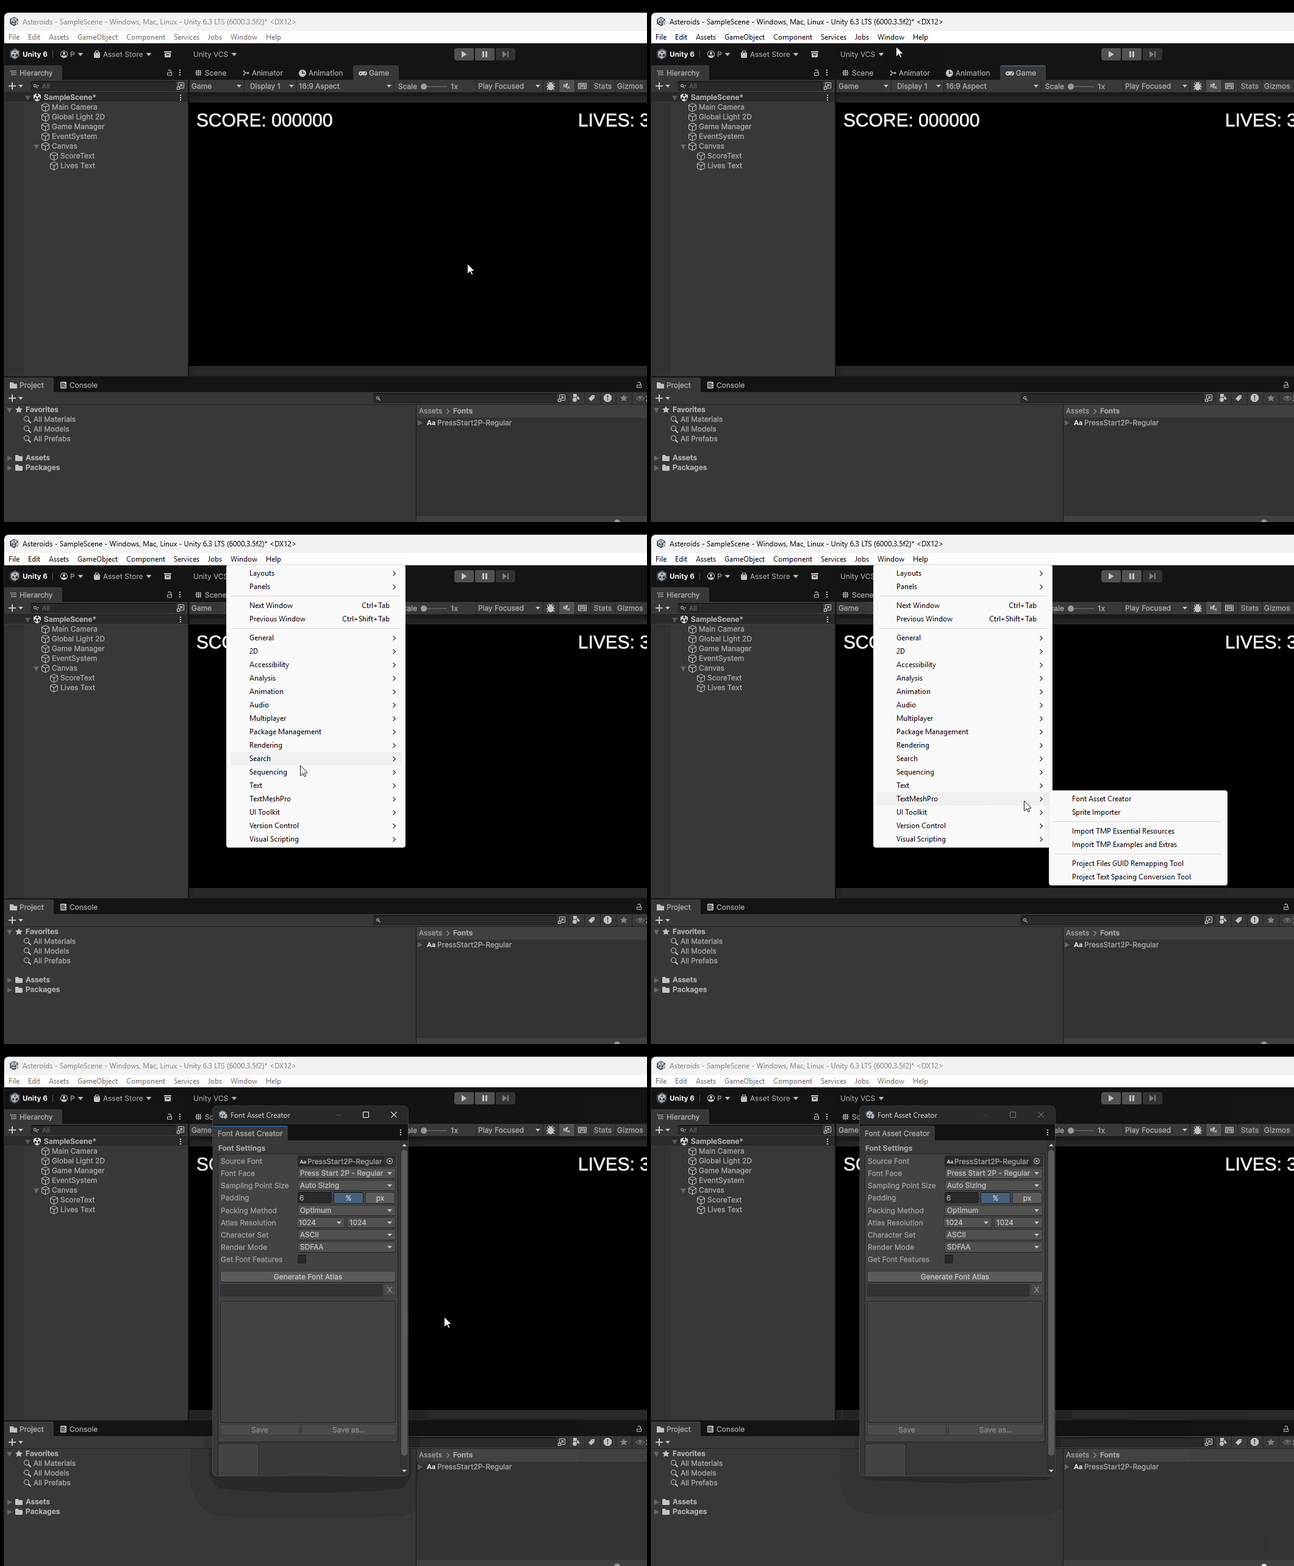
To create a font asset we first need to navigate to the Font Asset Creator. We can do this by navigating to Window > TextMeshPro > Font Asset Creator:
To create a Font Asset:
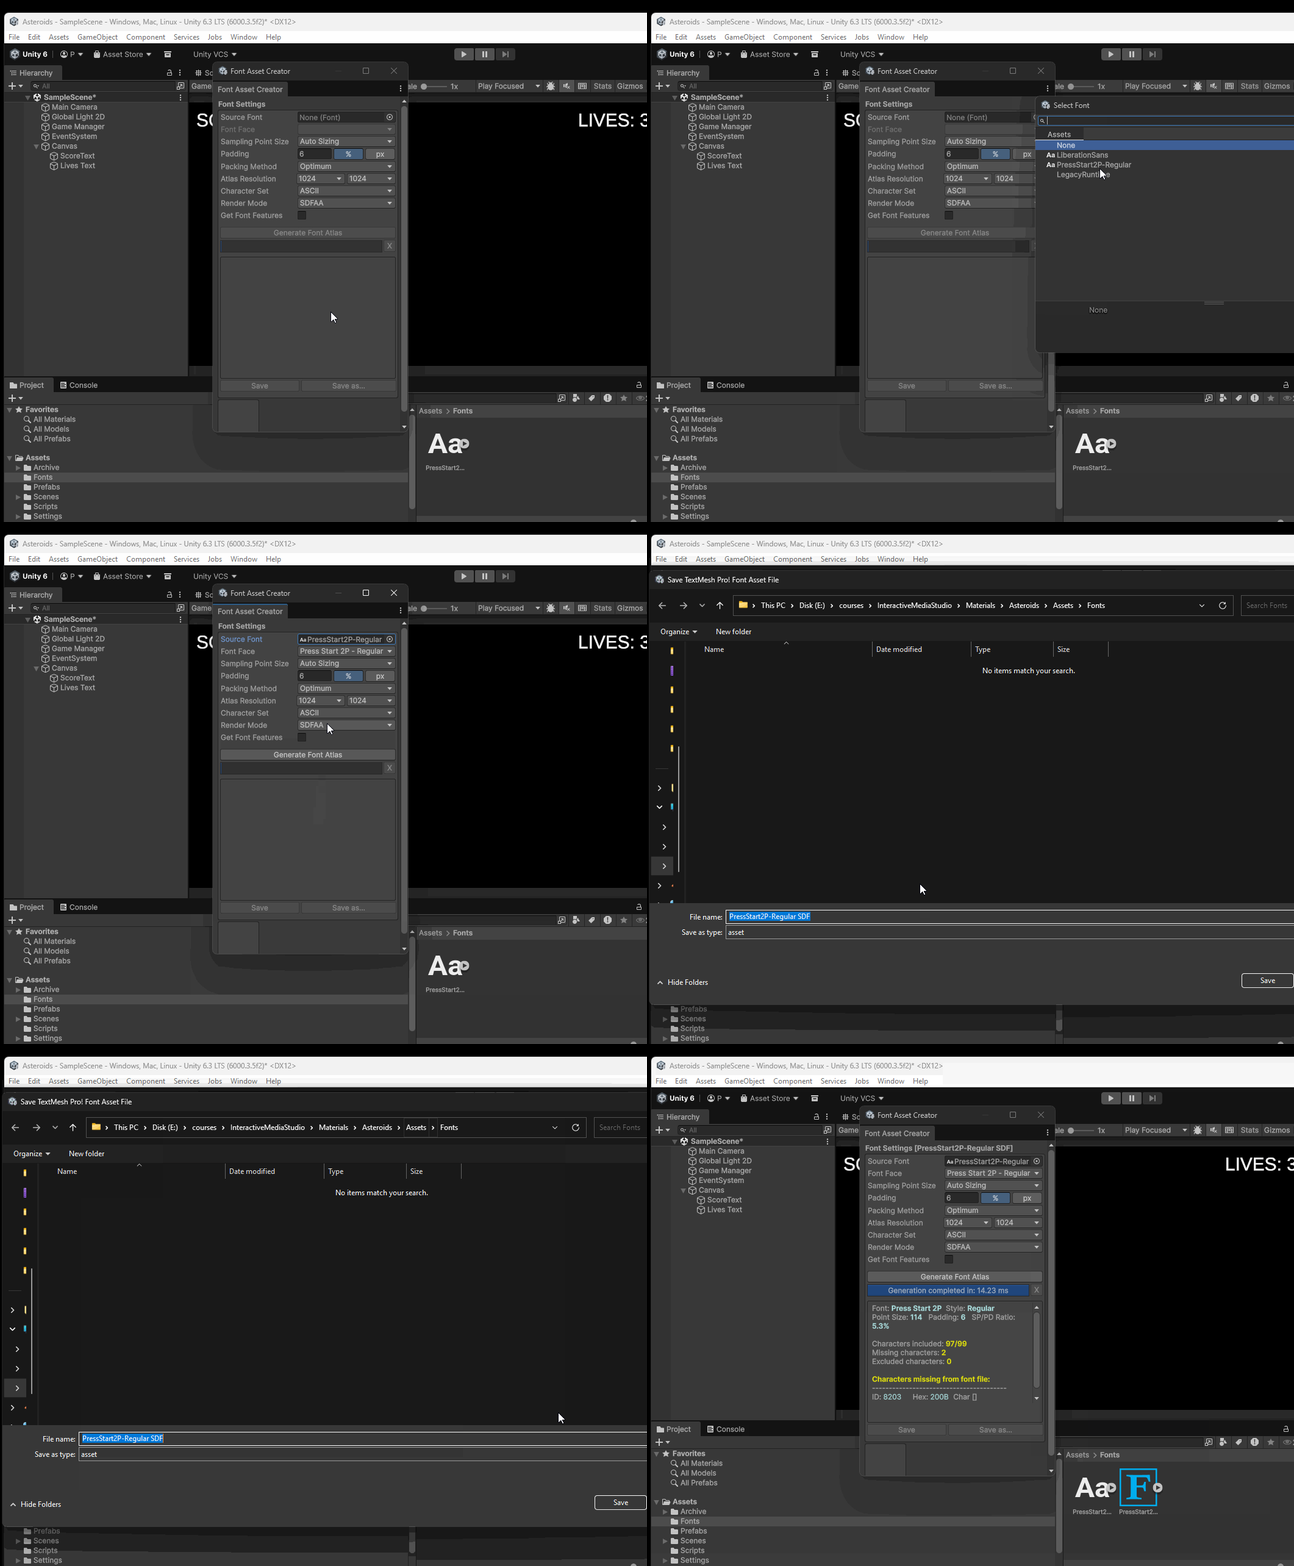
- Select your Source Font
- Choose your Atlas resolution (1024x1024) works in most cases
- Select Generate Font Asset
- Save your Font Asset to the Asset folder (or subfolder) of your Unity Project
Assigning Fonts
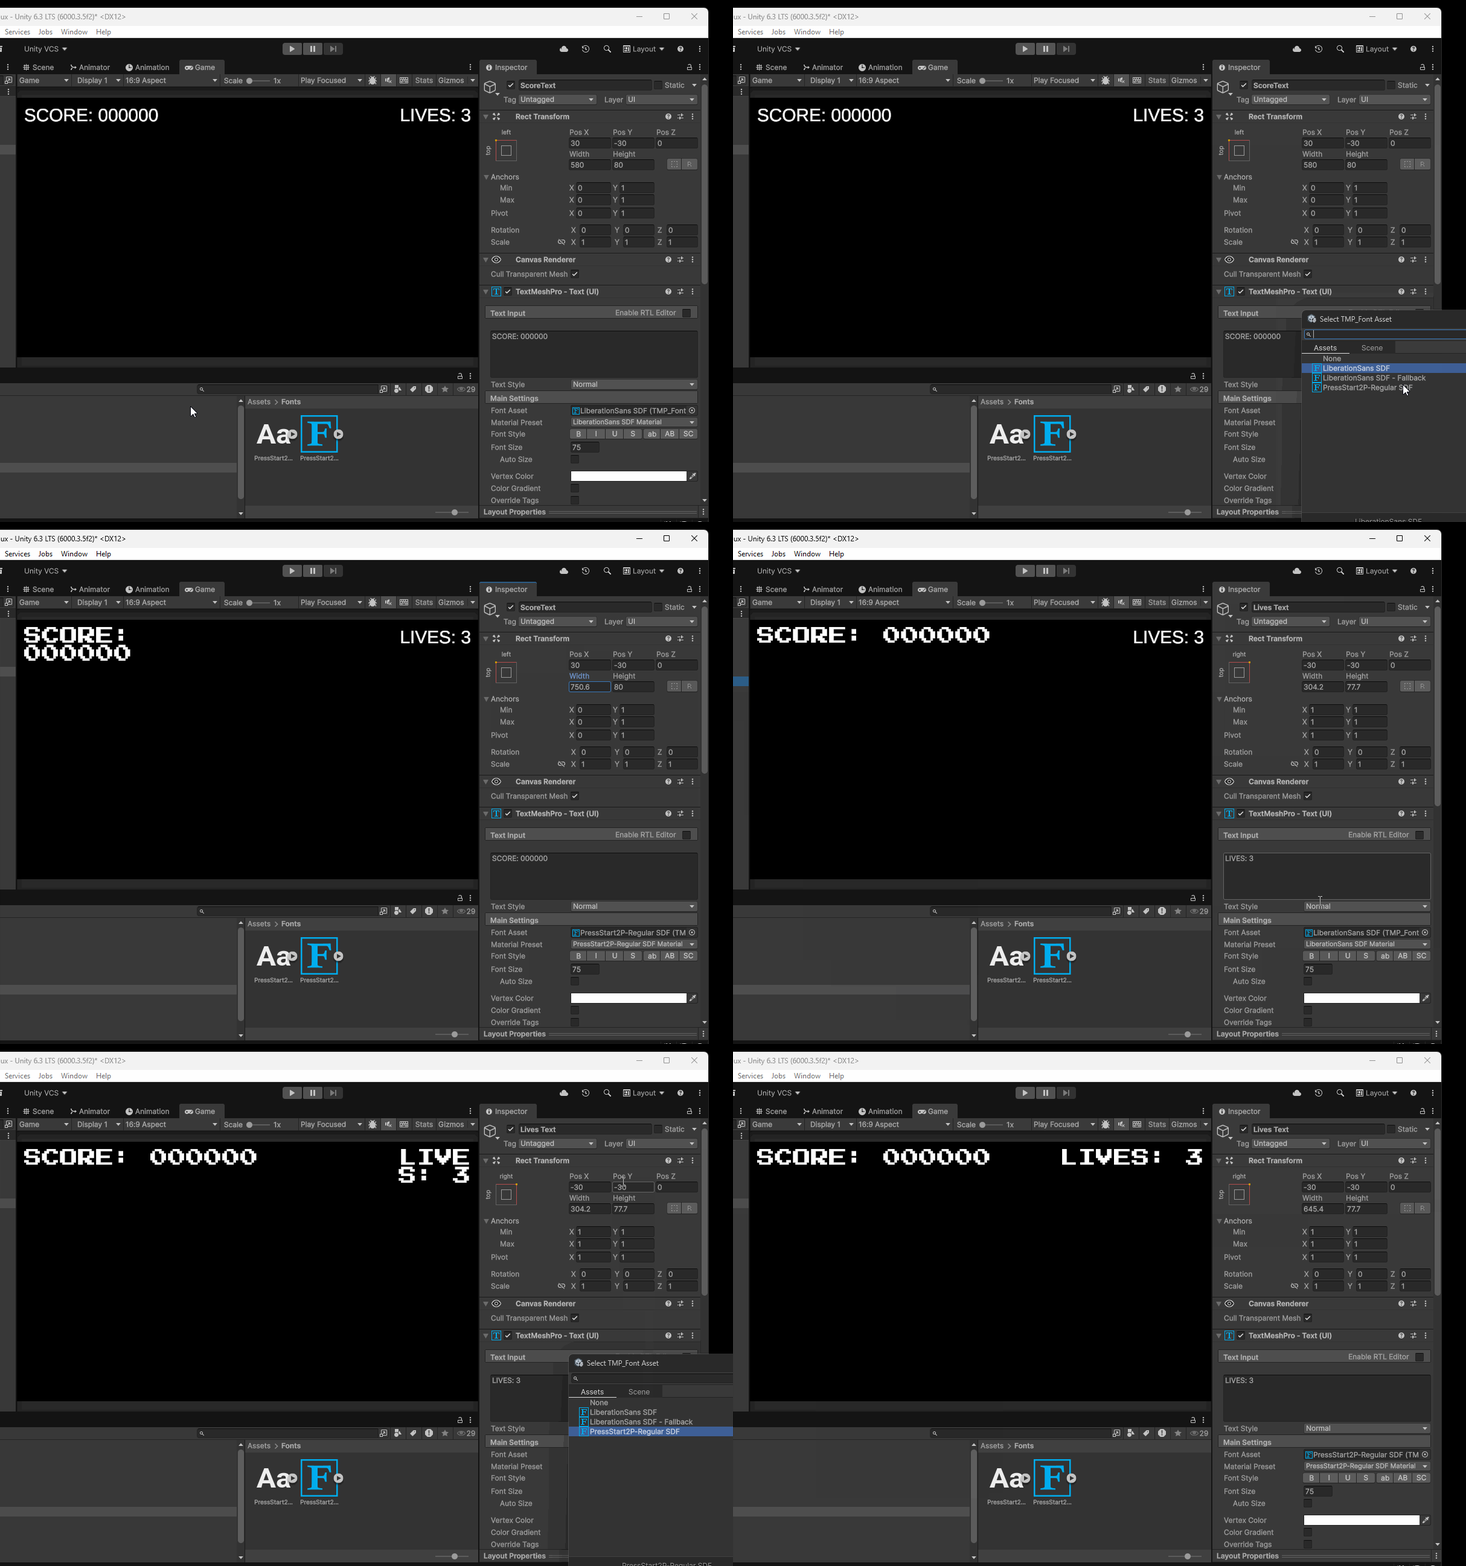
Once we create our Font Asset, we can then assign the asset to our text mesh pro objects. To do this, we can navigate to our Score Text and Lives Text, and select our font asset with the Text Mesh Pro component. We may need to adjust the width and height of our rect transforms: