Animation States
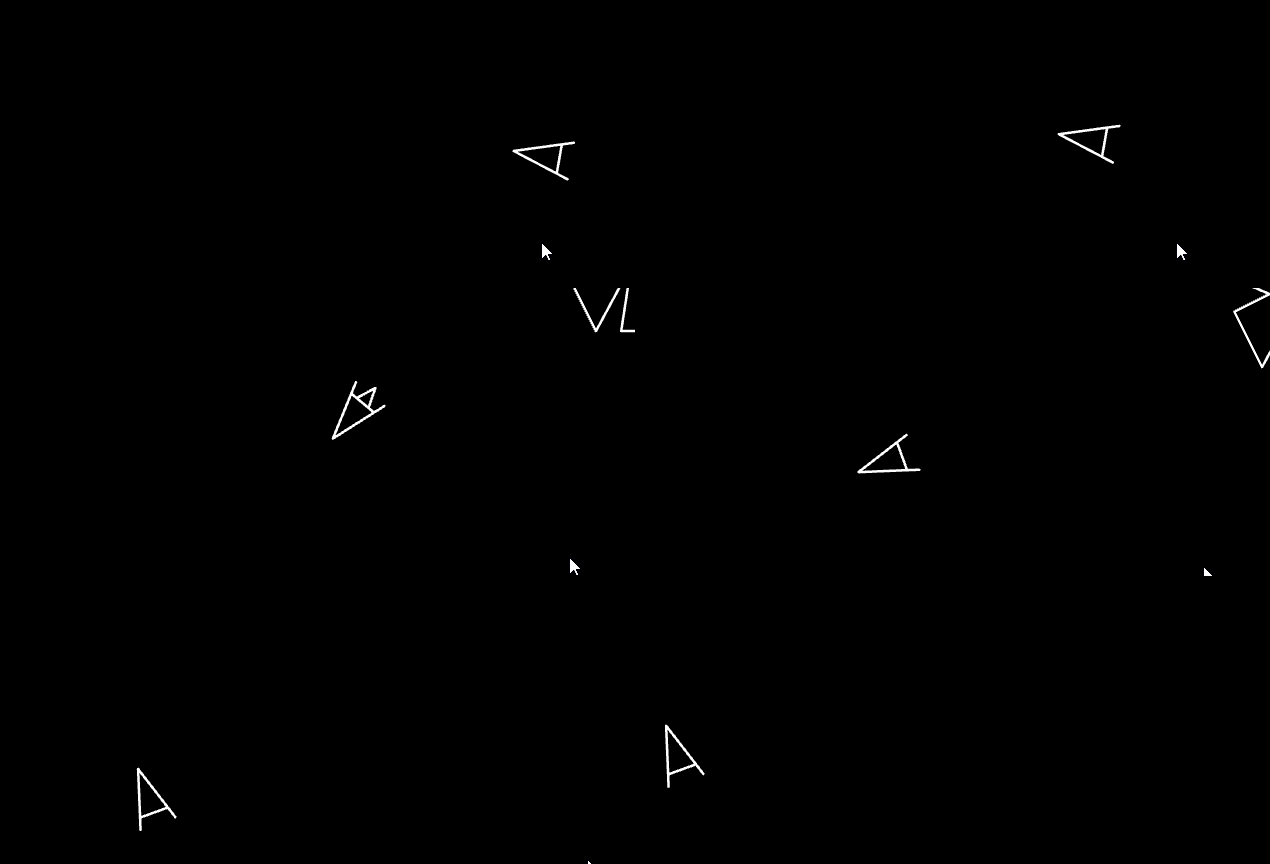
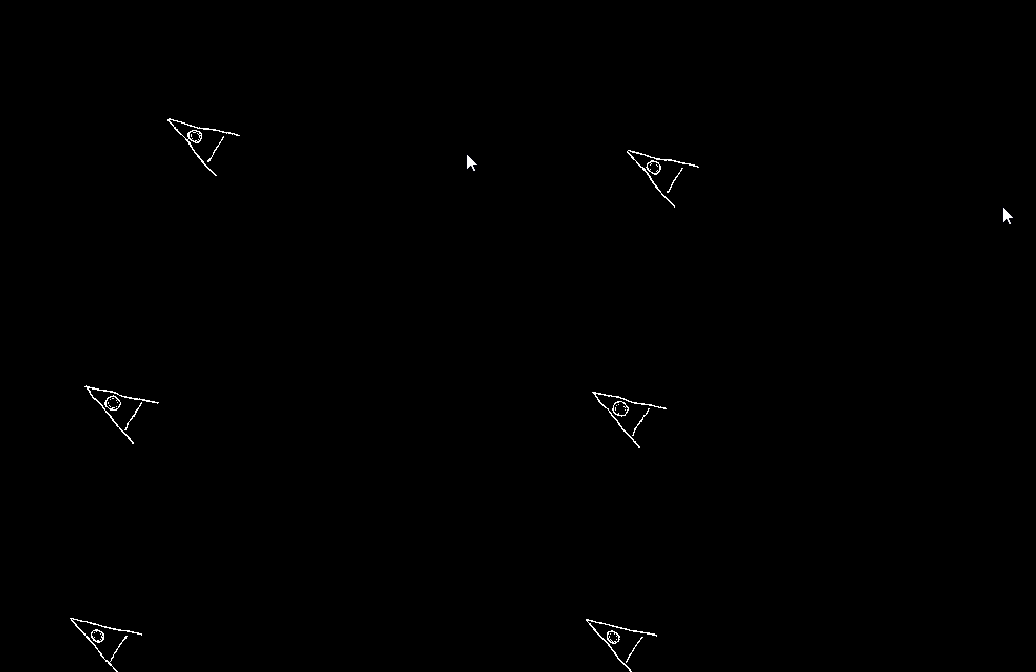
In this tutorial, we will learn how to use animation states with Unity. To begin, we can think of animation states as different moments of animation that our characters or objects move between. For example, within Asteroids there are two animation states for the player. In one state the thrusters for the spacecraft are off, in the other, the thrusters are on. (There is also a destruction state, but we will touch on that later.) Below, you can see an animated gif of these two states in action. In this tutorial, we will implement these two animation states within our Unity project.
Importing Animations
To begin, we need to import the two following animations. One is the idle pose for our player and the other is the thrust pose:
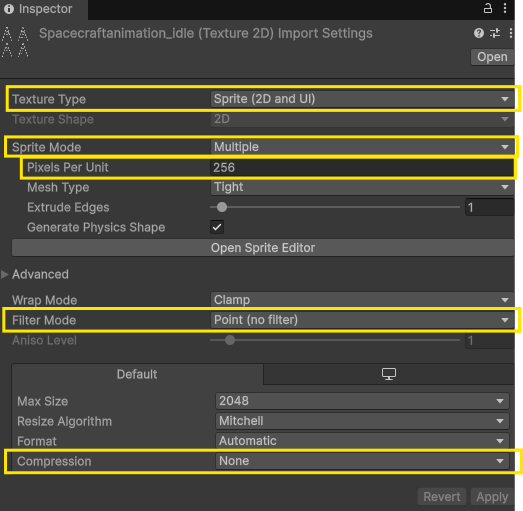
Following the import setting from the previous tutorial, download these two sprite sheets, slice them up in the sprite editor, and drag and drop the frames into your scene to create two animations. You should create two animations, one name spacecraft_idle and the other labeled spacecraft_thrust
You can import these animations using the following settings:
After importing and creating the animations, our hierarchy and art folder should look like the below image. You can see we now have a sprite, animator and animation for both the idle and thrust animations:
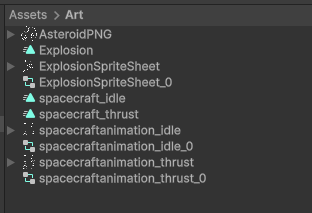
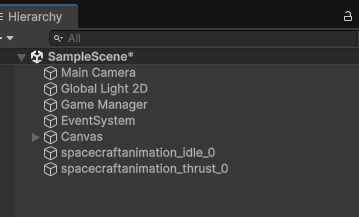
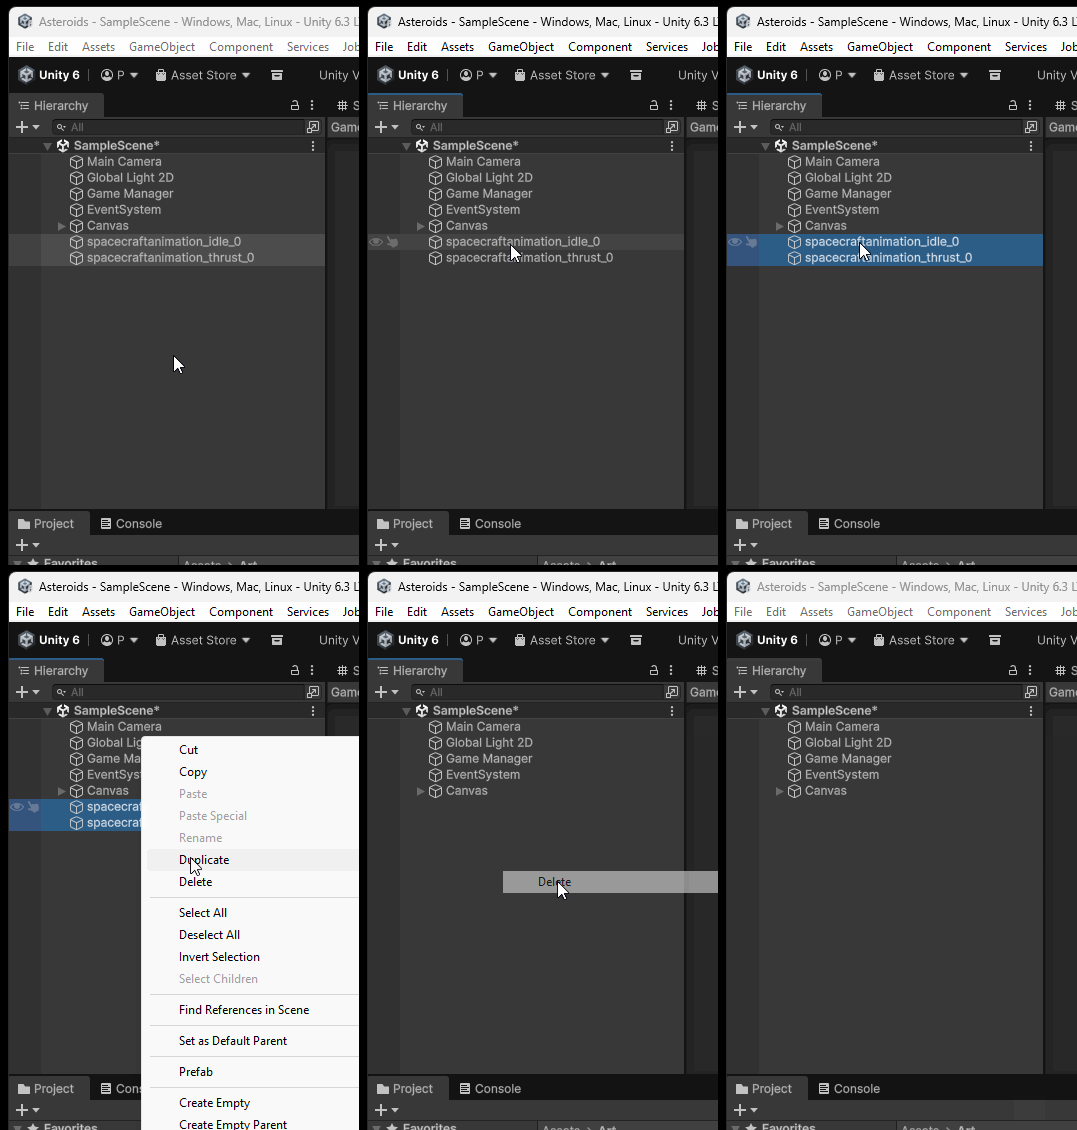
Let’s begin by deleting a few items we don’t need. We won’t need the two animations within our hierarchy, so let’s delete those.
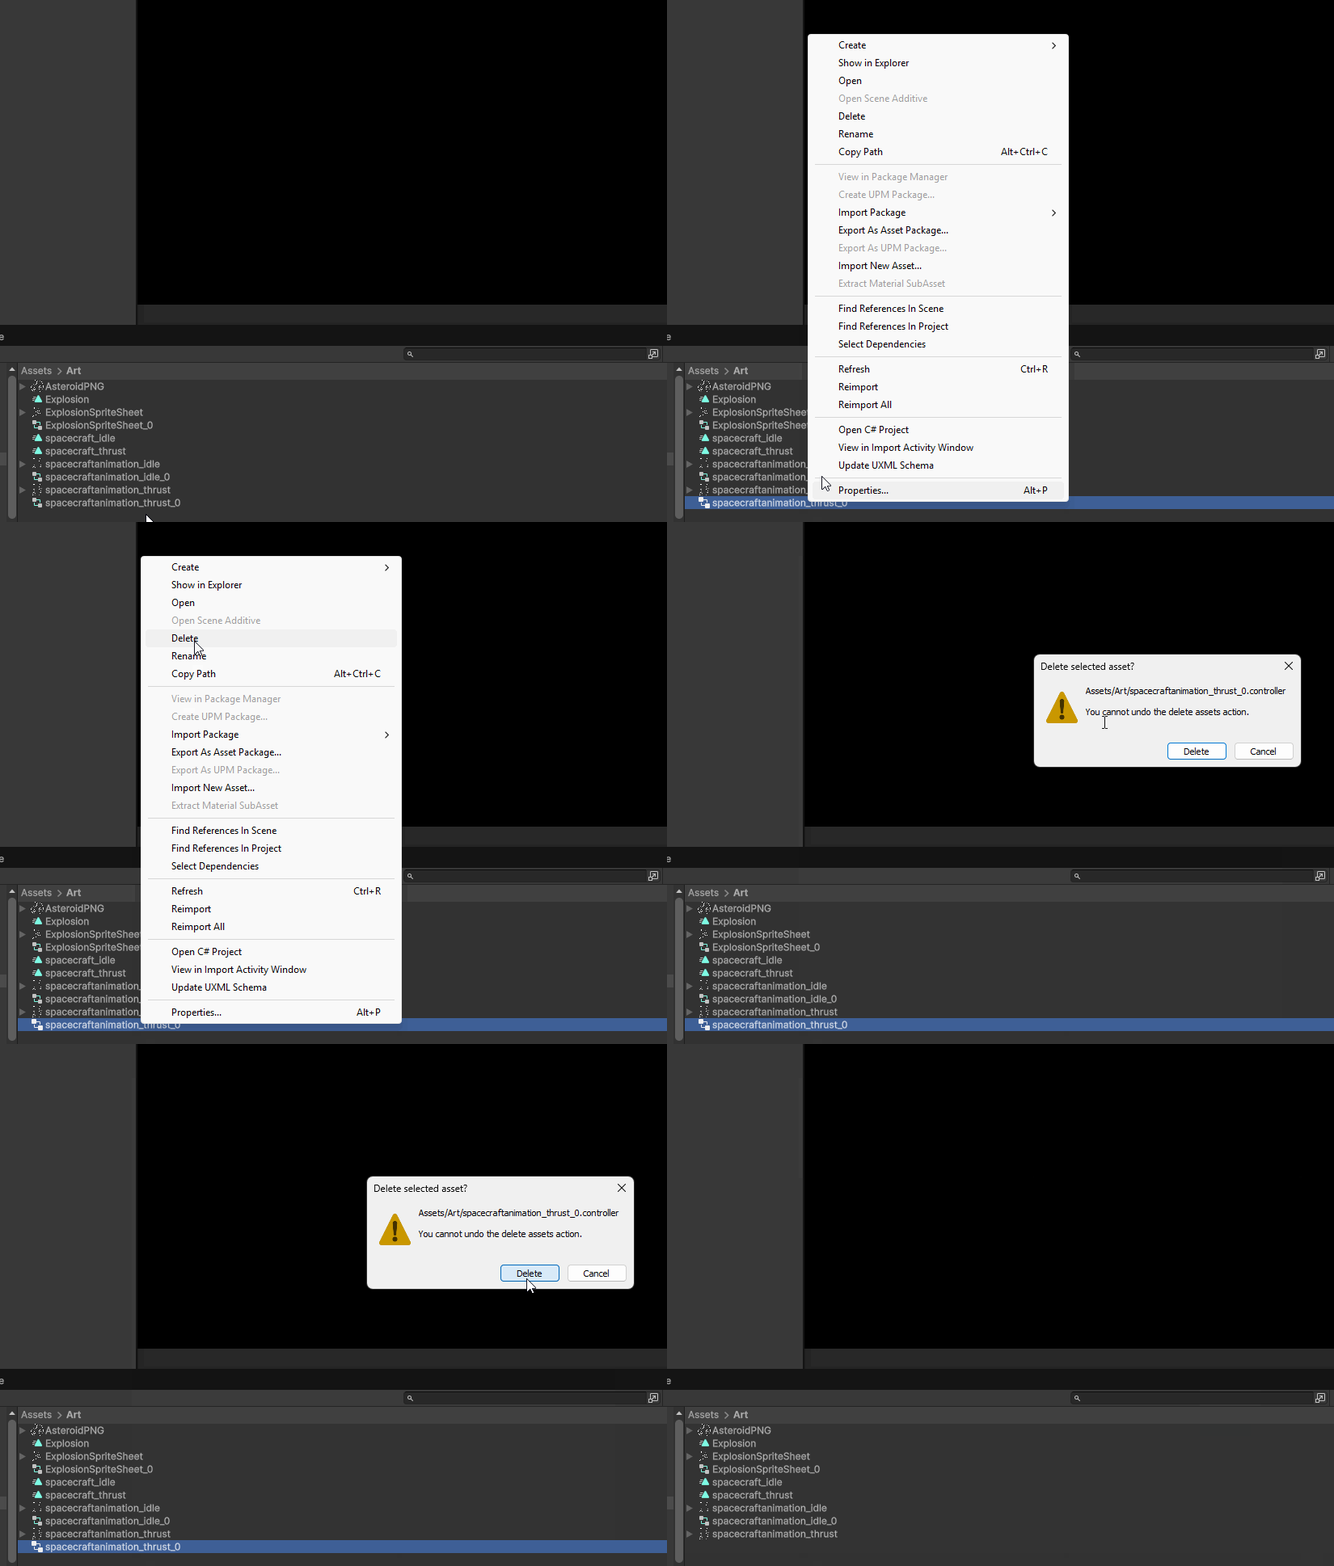
Next, we only need one animator controller for our player, so let’s delete our spacecrafteanimation_thrust animator controller from our project folder:
Assigning Sprite to Player
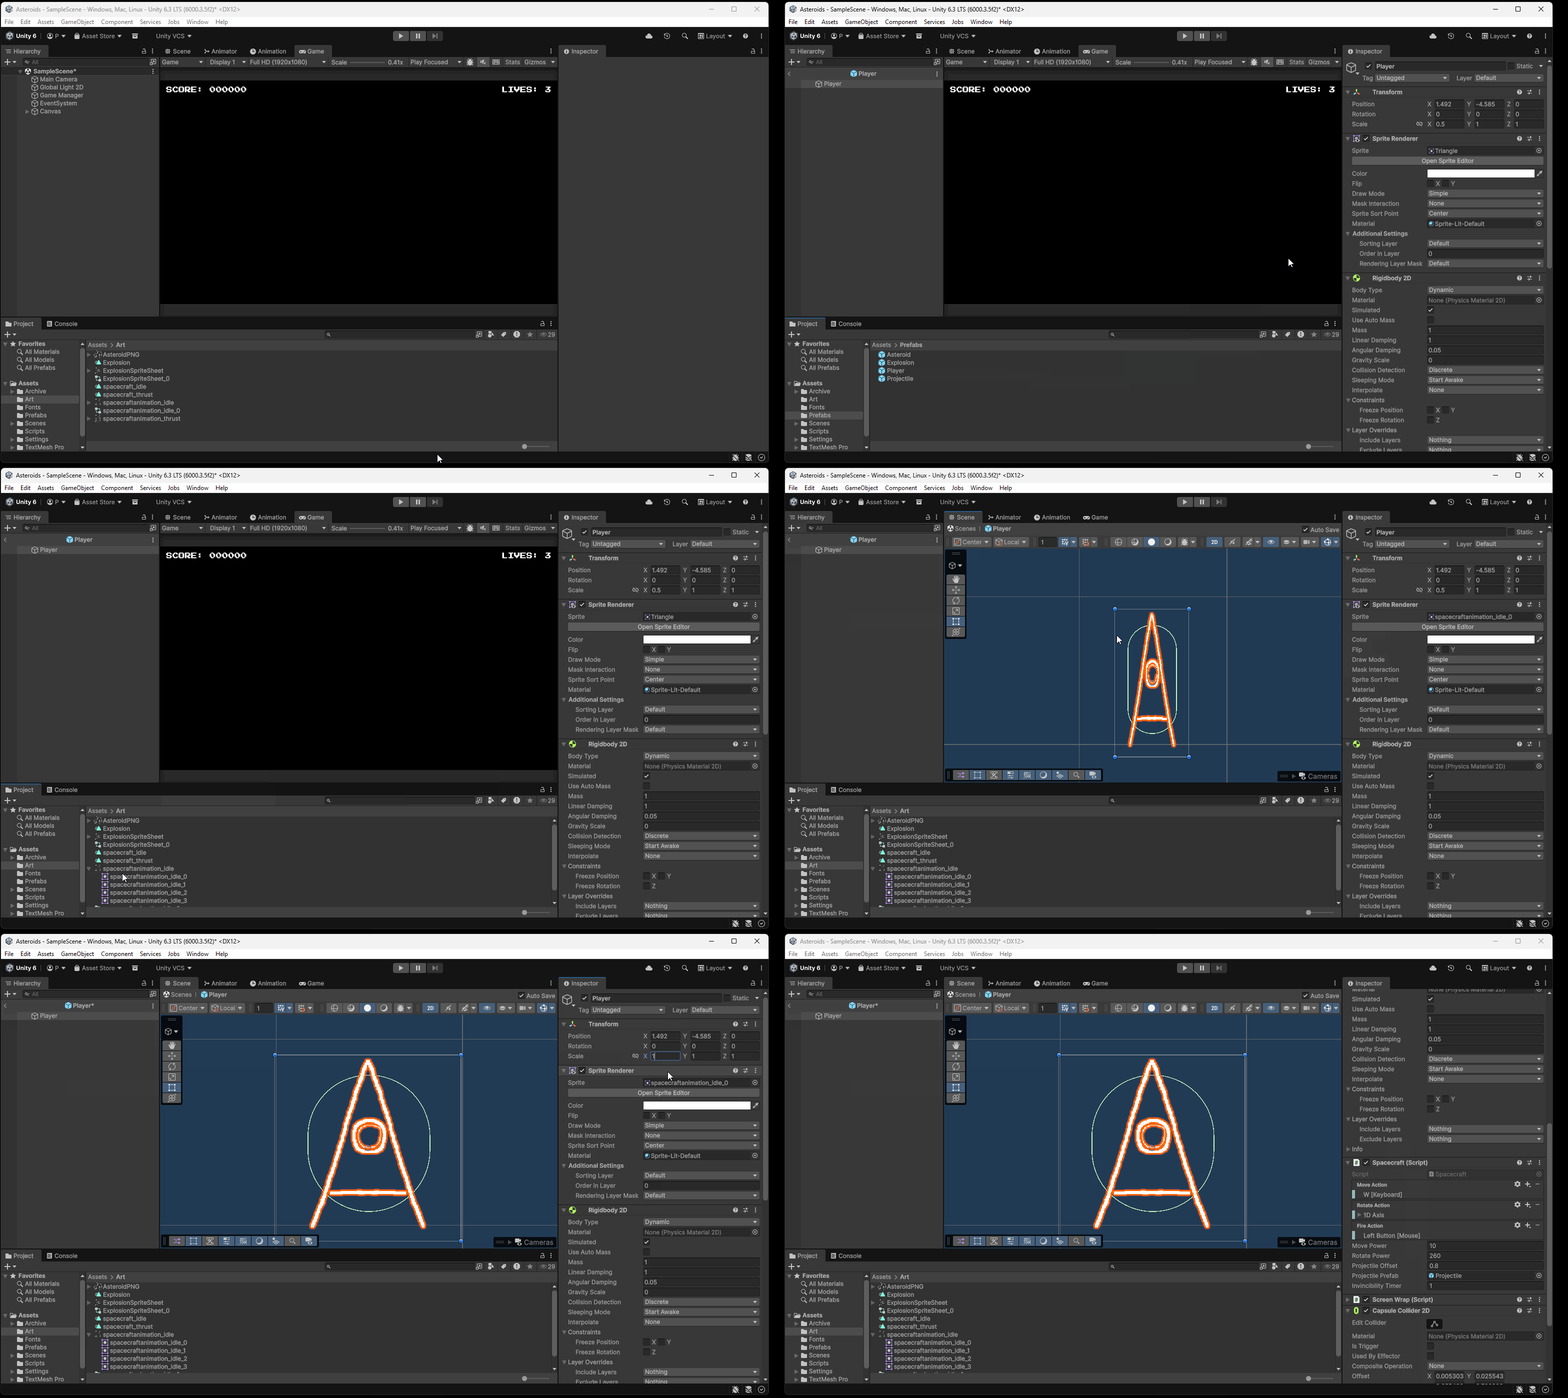
The next step we want to do is to assign one of our idle sprites to our player prefab. To do this, we need to select our player prefab, and drag in one of our idle spacecraft sprites into the sprite property of the Sprite Renderer component. Note that you might have changed the scale of your original game object and we may need to set its scale to be 1 on the X, Y, and Z axes:
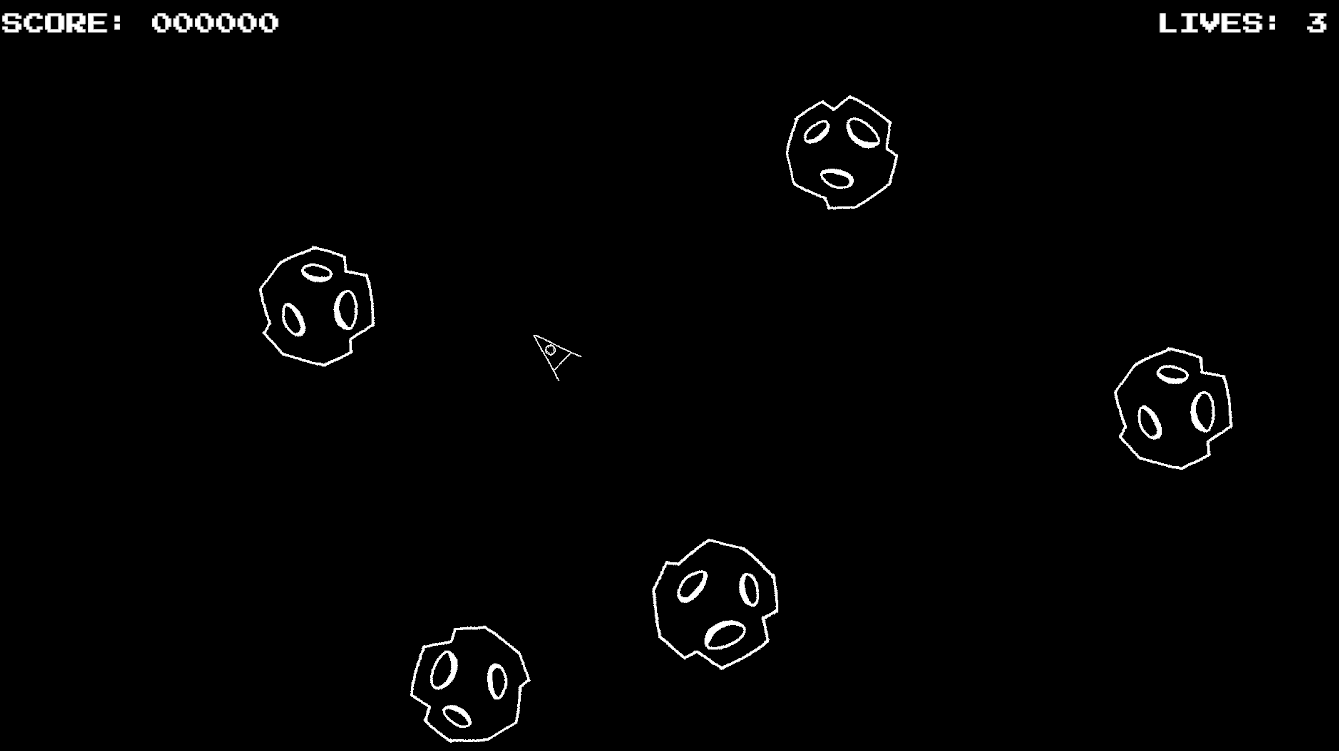
If we now play our game, we should see our player sprite on our player game object during play:
Adding Animation to Player
To play our idle animation on our player, we first need to allow our player to play animations. To do this, we need to add an Animator component to our Player prefab.
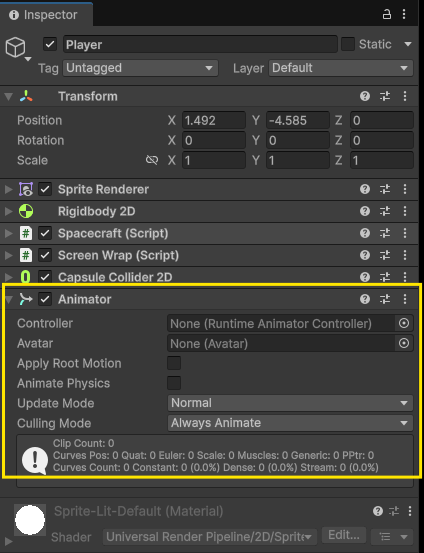
Next, we need to make sure that our Animator has an Animator controller assigned to it. For our player, we can use the spacecraftanimation_idle_0 animator controller we created when we made our idle animation:
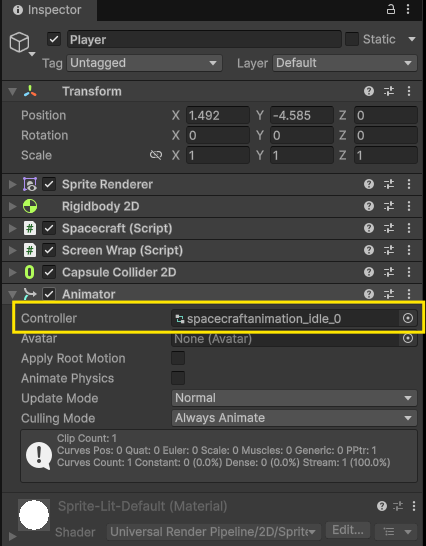
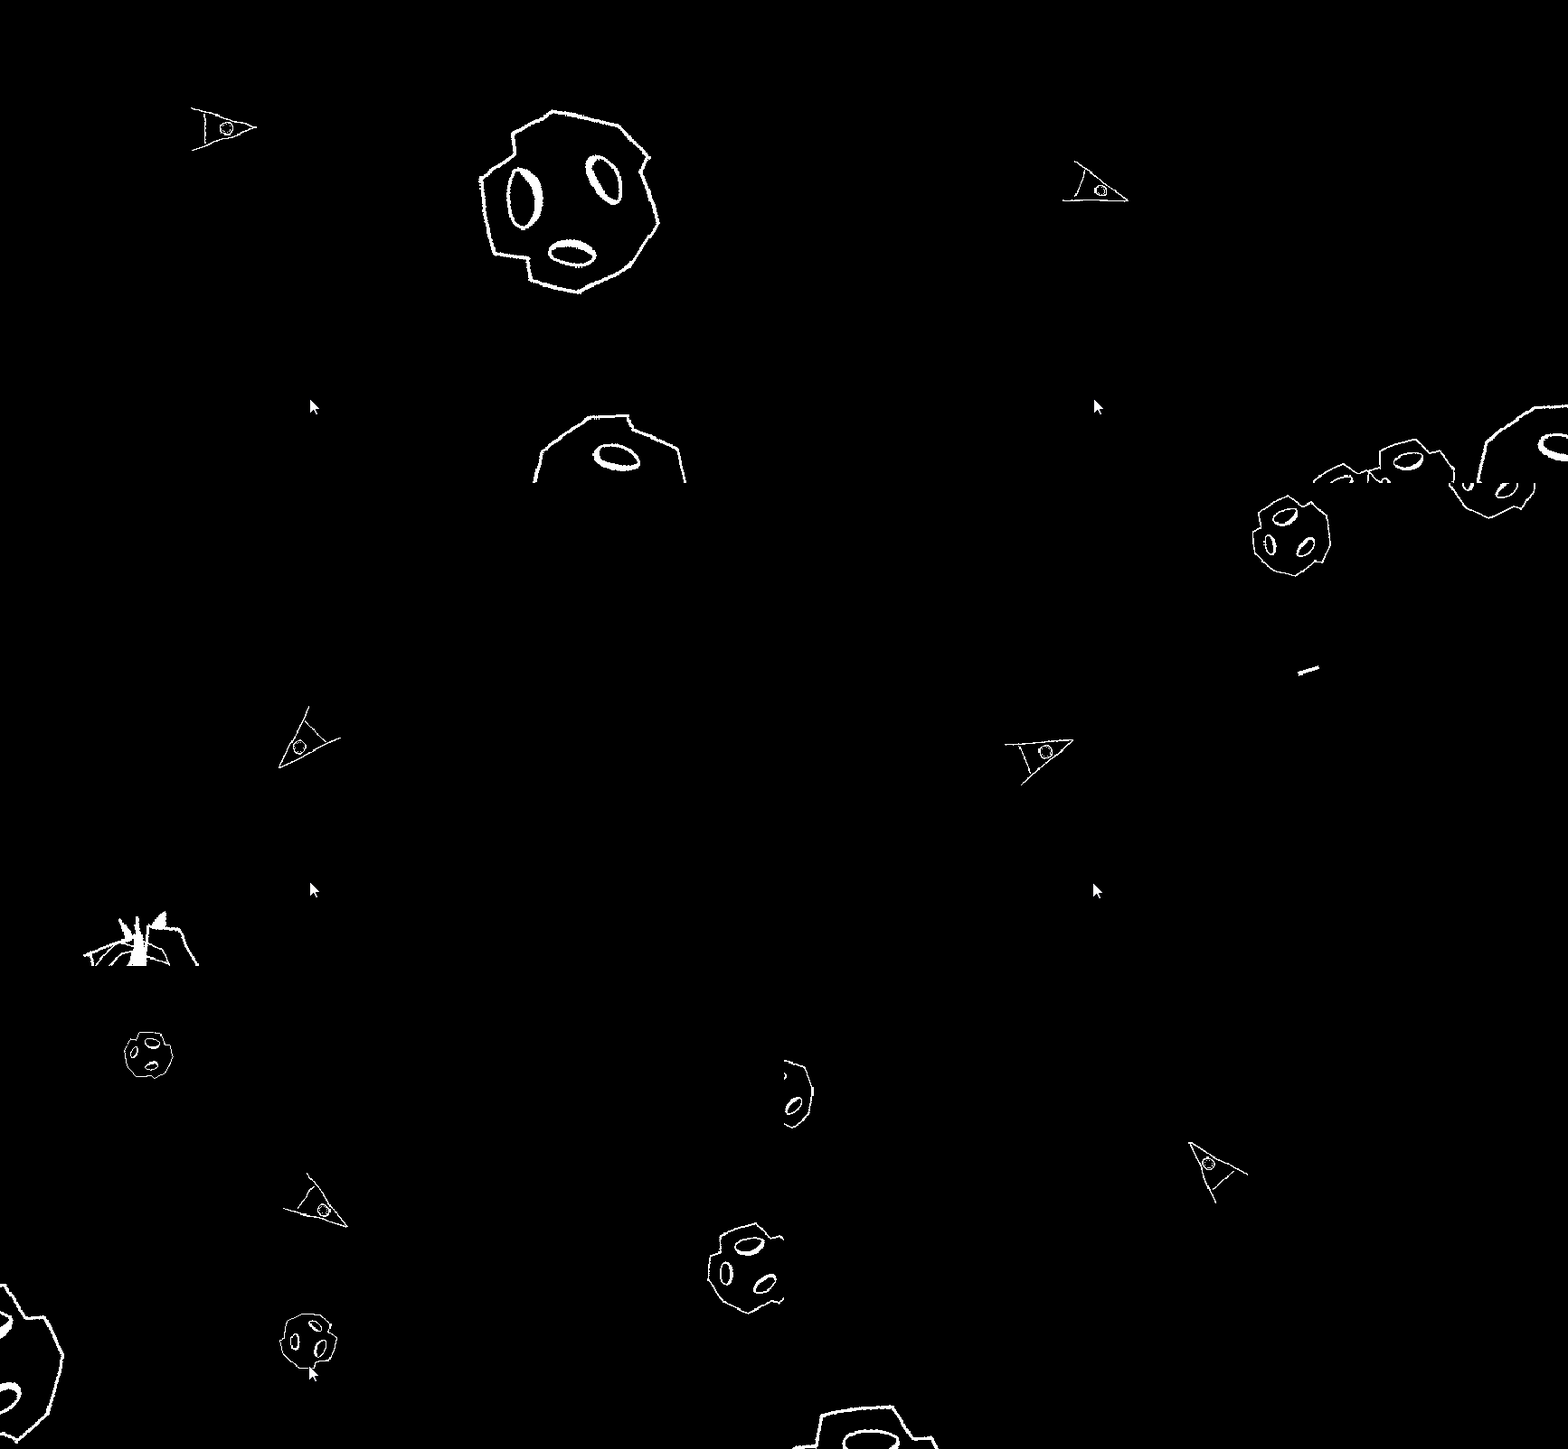
If we now play our project, we will see that our idle animation now plays.
Animators
So why is our animation playing? To understand this question, we first need to understand how animators and animations work within Unity.
To do this, we first need to open the Animator window.
With your player prefab selected, Navigate to Window > Animation > Animator:
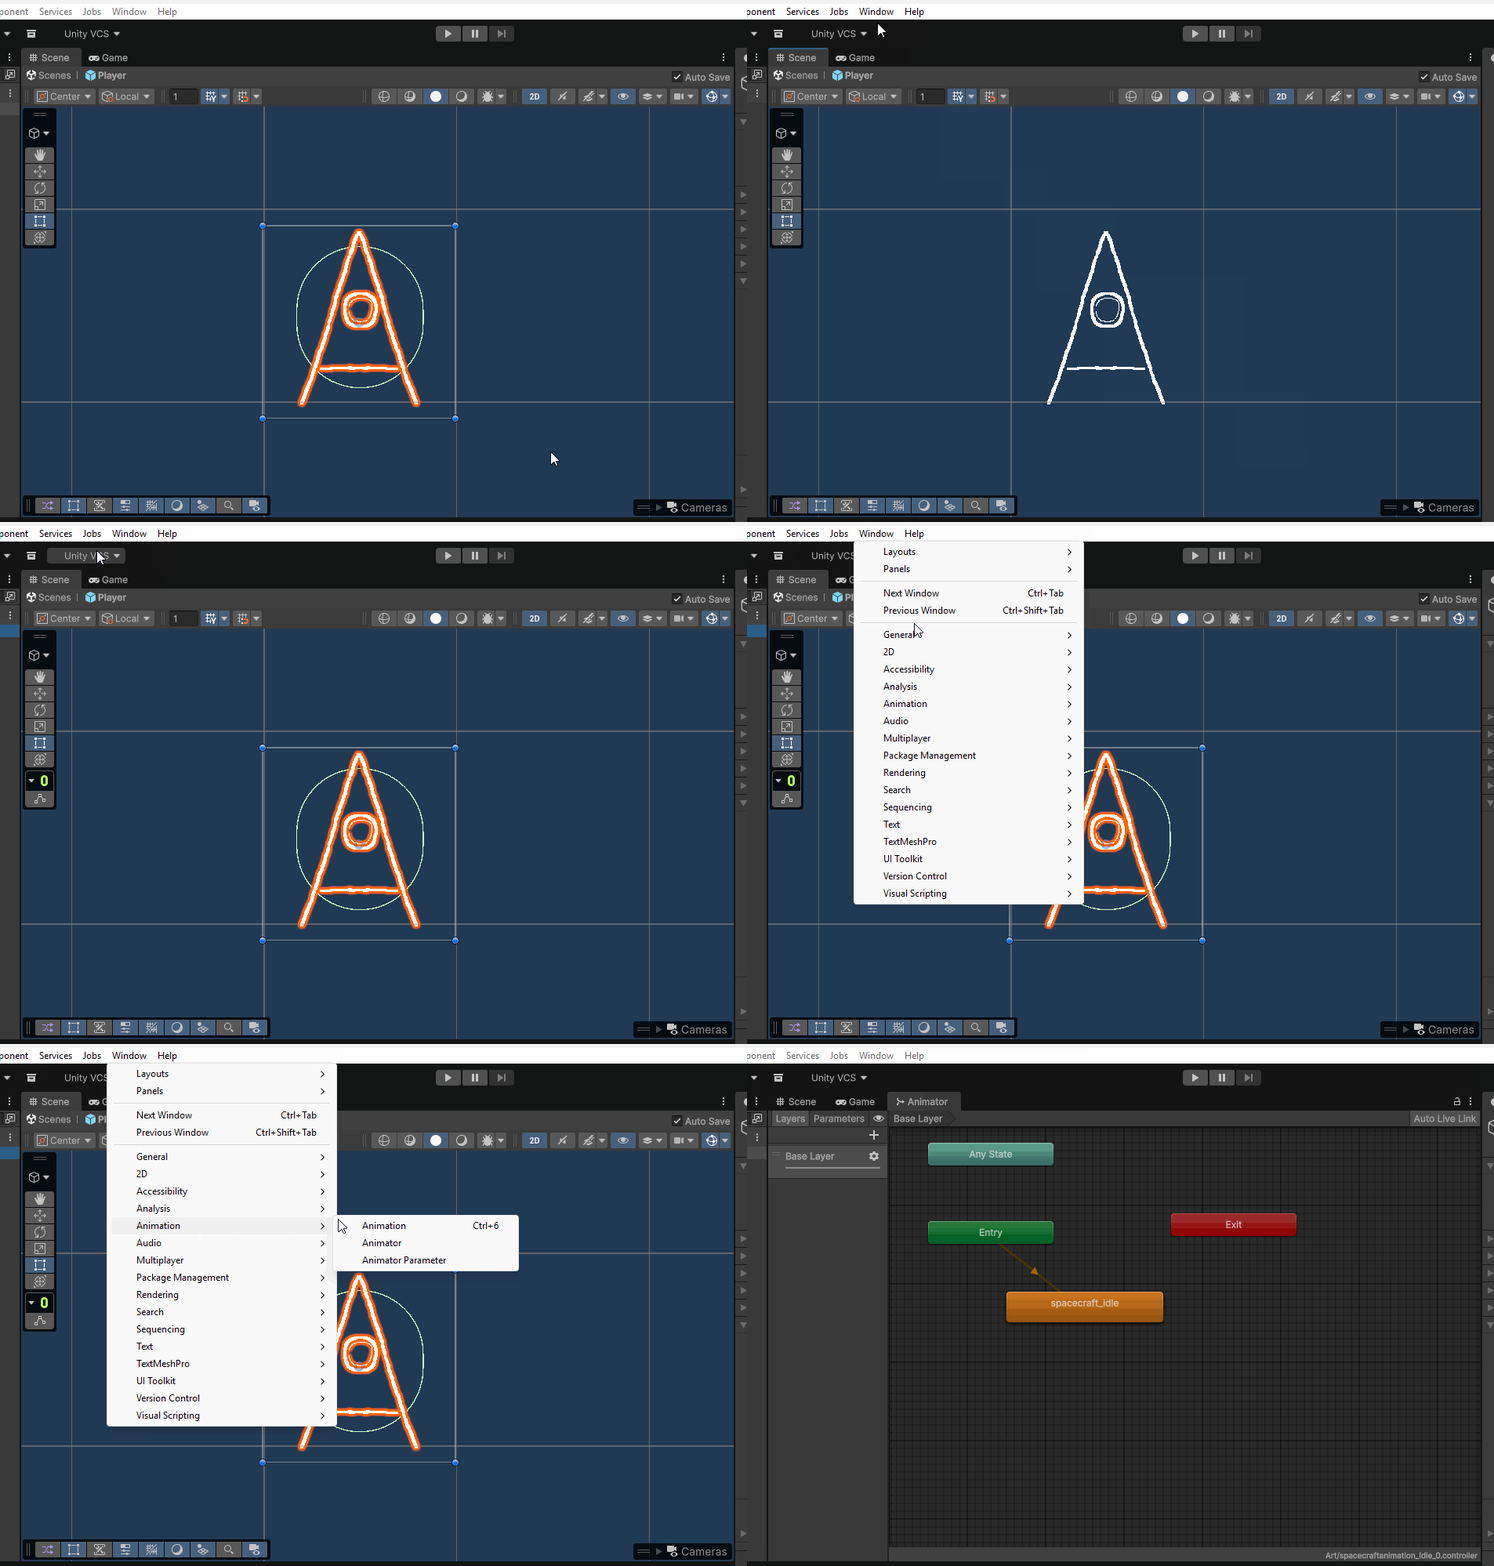
Within our animator, we can notice a variety of boxes, each labeled with a different word. Importantly, we see a box labeled spacecraft_idle which matches the name of the animation we created earlier in this tutorial. What we are looking at is called animation states.
The animator controller, the object that was created when we made our animation, is a map that tells our Animator component on our game object which animation to play based on different conditions.
If I play my game and look at the animator widow with the instantiated player in my scene selected, I will see a blue line below my spacecraft_idle animation, indicating that this animation is playing:
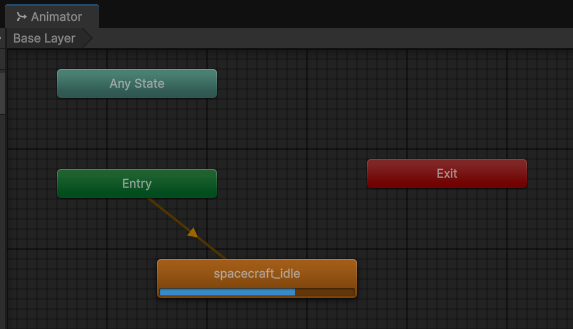
What is happening in this situation is that since my idle animation is directly connected to Entry, my idle animation is going to begin playing as soon as my game begins.
Animation States
Using the Animator window to edit my animation controller, I can get different animations to play based on certain conditions. In our case, we want our thrust animation to play when our player is holding down the thrust button.
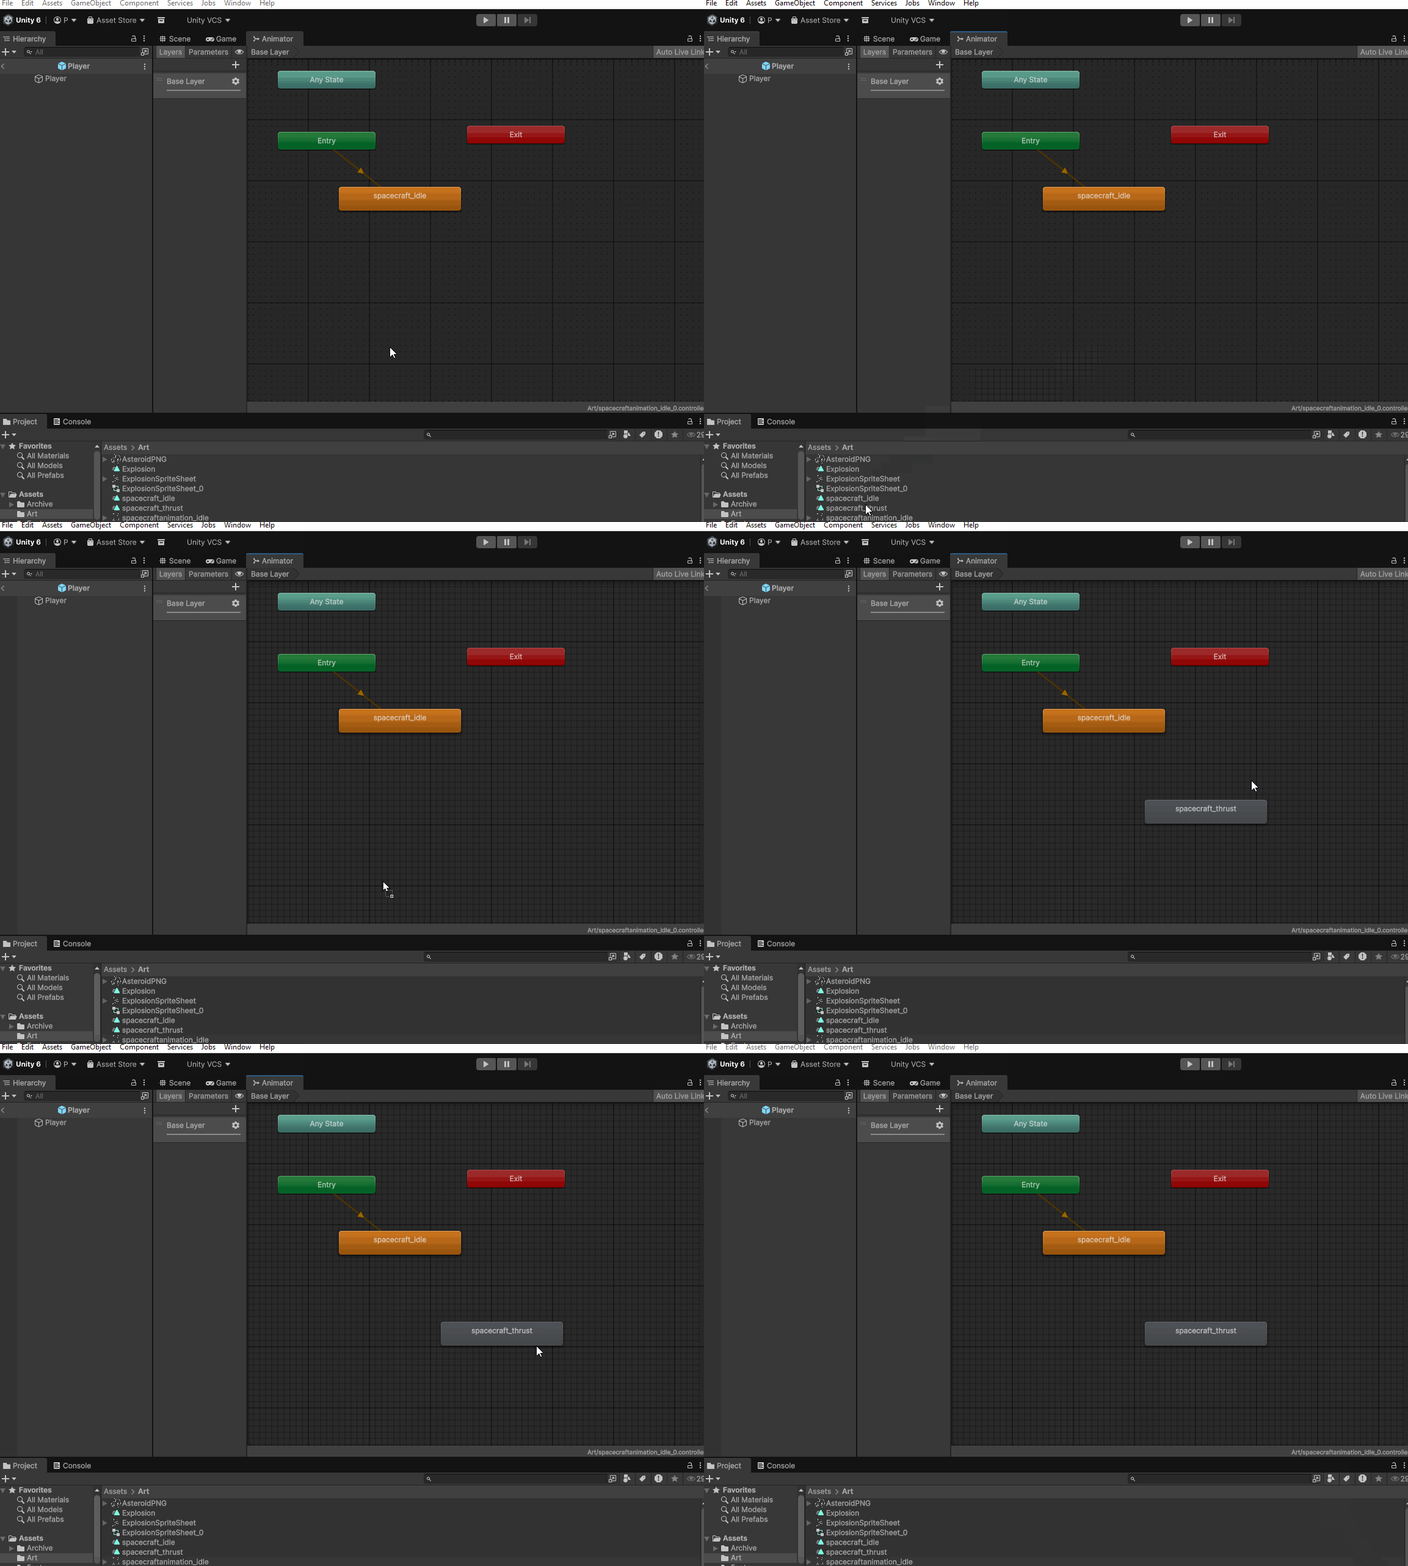
To achieve this, we first need to bring our thrust animation into our animator controller. There are multiple ways to do this, such as making a new state, however, most commonly, we can drag our animation into our controller. Let’s drag our thrust animation into the animator controller on our player prefab:
Transitions
Currently, we have the animation within our Animator controller, however, this animation will not play as it is not connected to any other state or animation. There is an option to access animations that exist within an animator controller through code, but, often times, we make to transition back and forth between different animations.
For our example, we want our player to transition from the idle animation to the thrust animation when the thrust button is pressed. To do this, there is a multi-step process:
- Set the transitions in the animator
- Create Parameters
- Set the conditions within the animator
- Access the animator in code
- Access the condition in code
- Set conditions so that animations transition how we want
Create Transitions
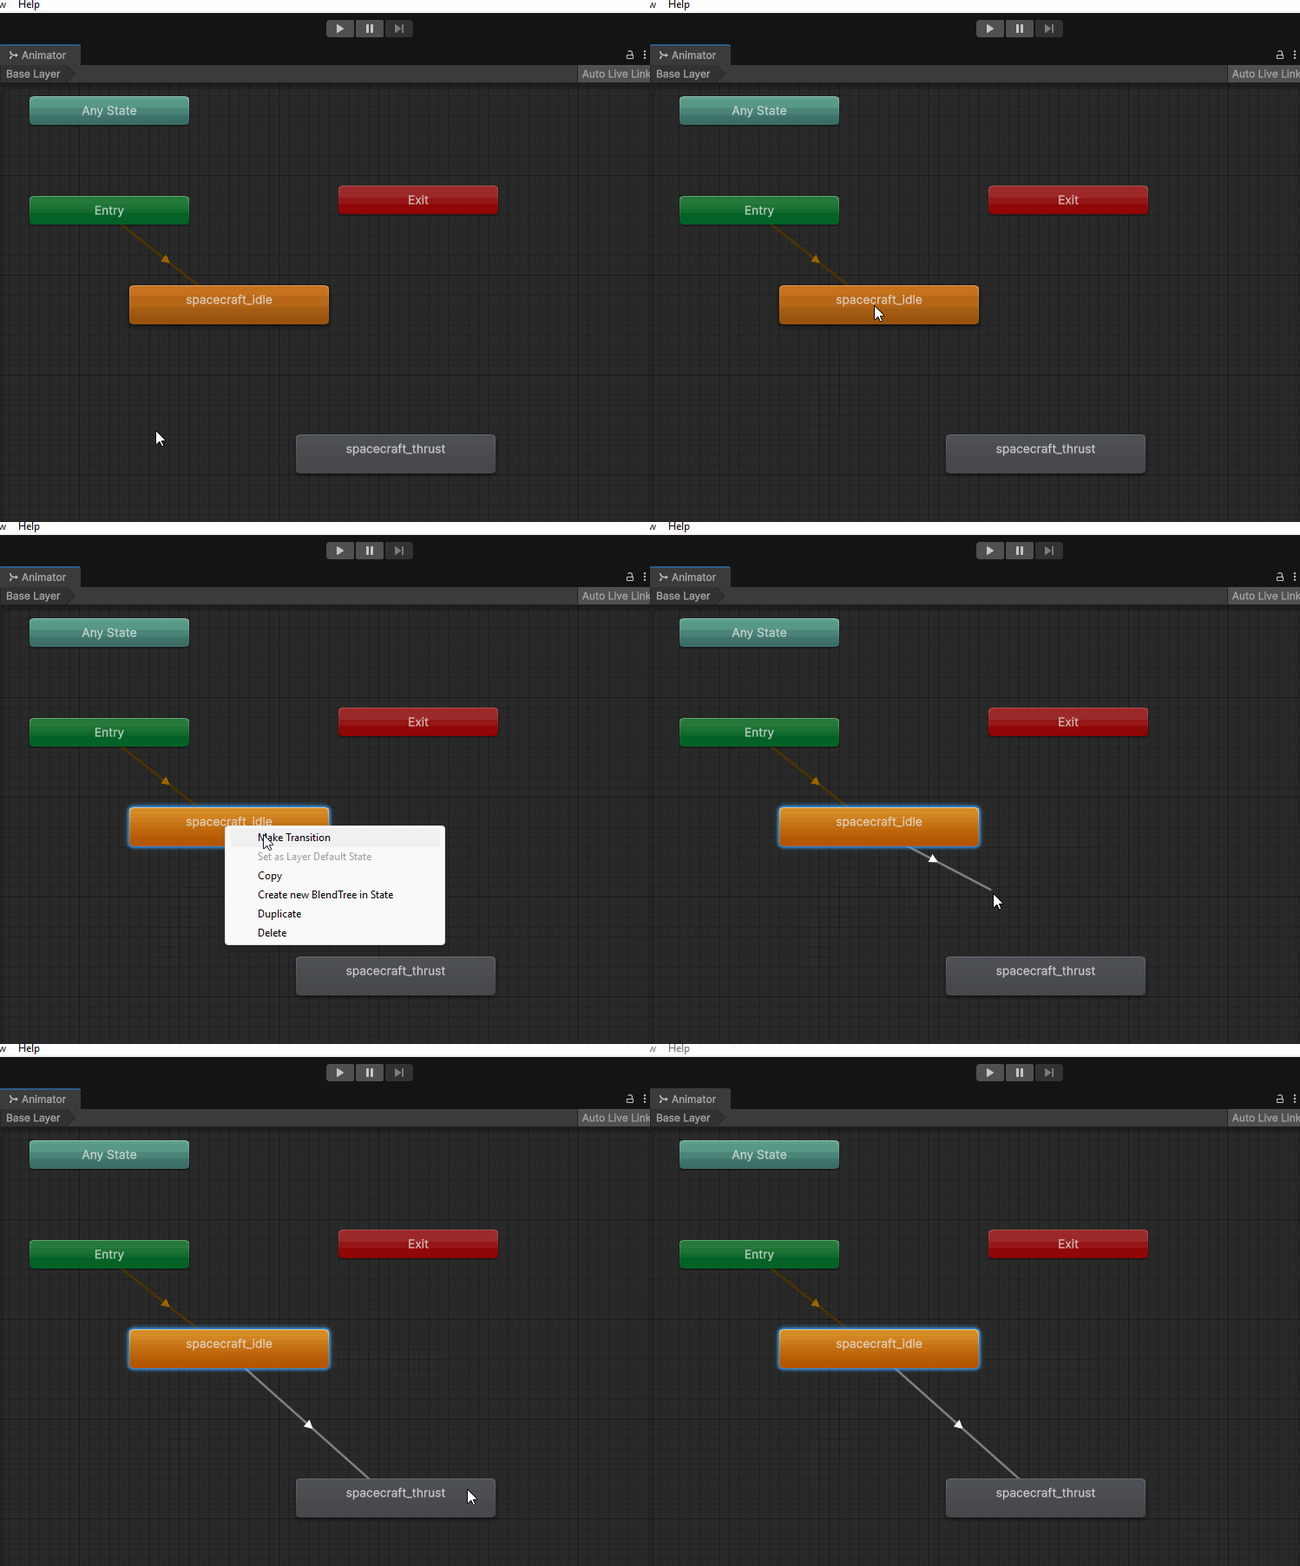
To create transitions within the Animator, we first need to select the state we want to transition from.
From there, we can press right click and choose Make Transition and then click on the state we want to transition to. This will create a line with an arrow indicating the direction the transition is moving. We can do this to make a transition from our idle state to our thrust state:
We can also do this to set a transition back to our idle state when our thrust button is not pressed:
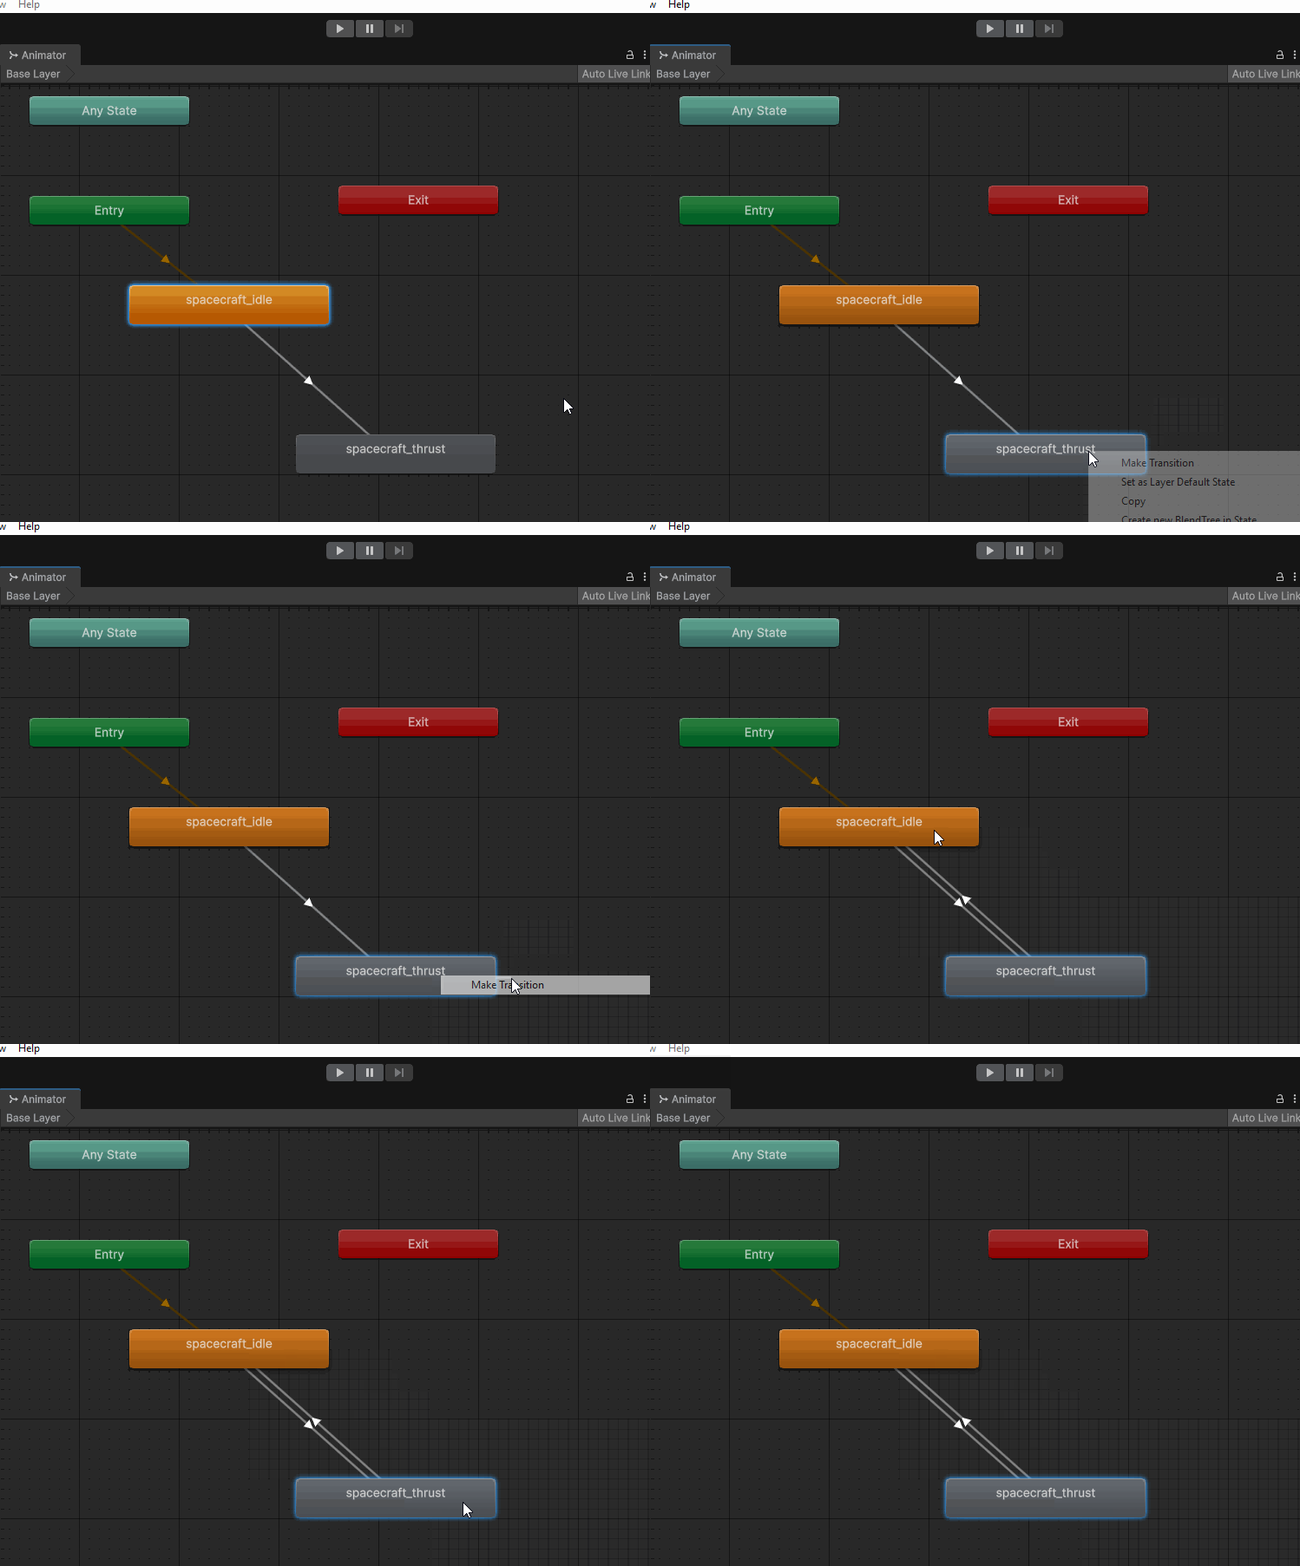
If we were to play our game now, we would see that our thrust is constantly turning on and off. This is because our animator controller is continuously transitioning between the two states. To prevent this behavior, we need to add some conditions that control when our animation transitions.
Creating Animation Parameters
To create conditions which we can use to decide when our animations transition, we first need to create parameters that control those conditions. Parameters can be made within the Animator window and can consist of the following types of parameters:
- Integer - a whole number
- Float - a number with a fractional part
- Bool - true or false value (represented by a checkbox)
- Trigger - a boolean parameter that is reset by the controller when consumed by a transition (represented by a circle button)
With these parameters, we can detect the value of each created parameter and then use that value to decide how to control our animation.
For example, with our transition from idle to thrust, we could use a variety of parameters. We could, for example, use a float or int parameter to detect the value of our input and then use this value to decide which animation will play. Or, we could use a Bool parameter that is set to true when the player is moving their character and false when the thrust button is not pressed.
In this tutorial, let’s use a bool parameter that is either true or false depending on if the player is pressing the thrust button.
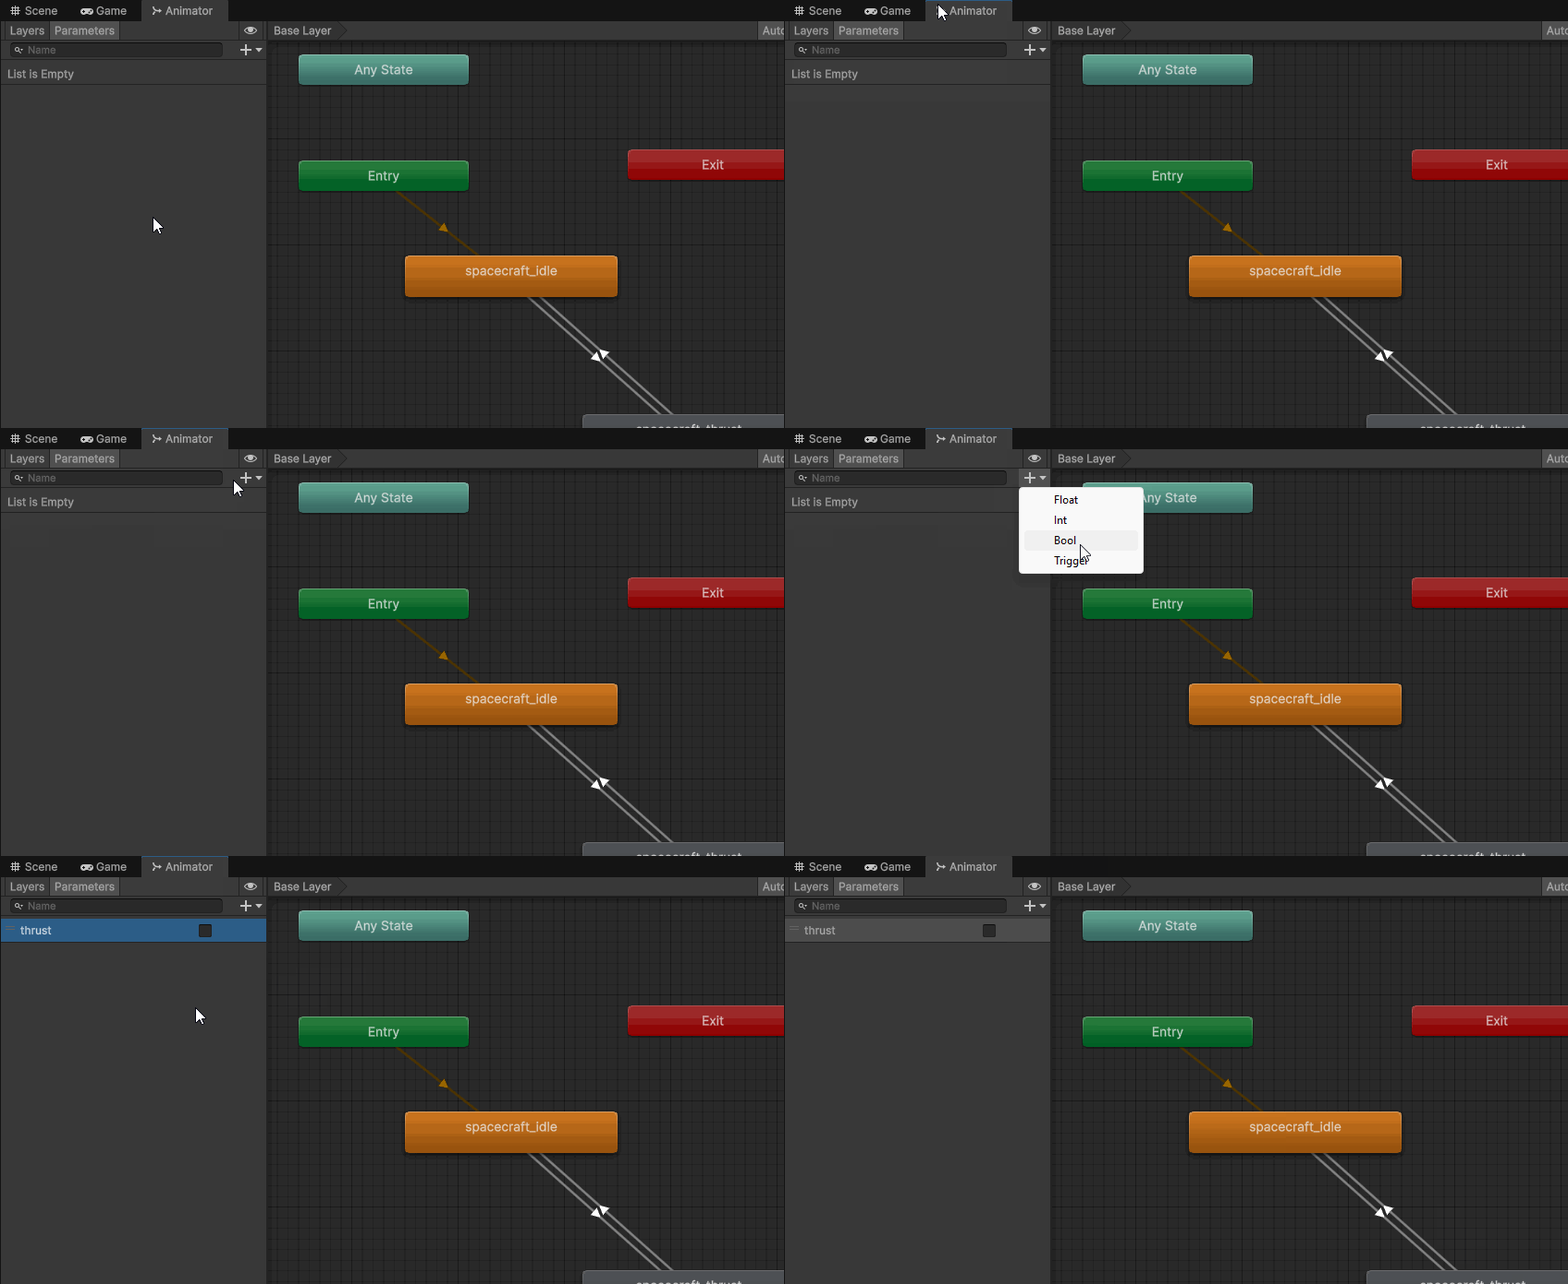
To do this, we first need to create a bool parameter. To create a parameter
- Navigate to the parameter tab in the Animator window
- Press the plus button to add a new parameter
- Select bool
- Name the parameter “thrust”
Setting Conditions
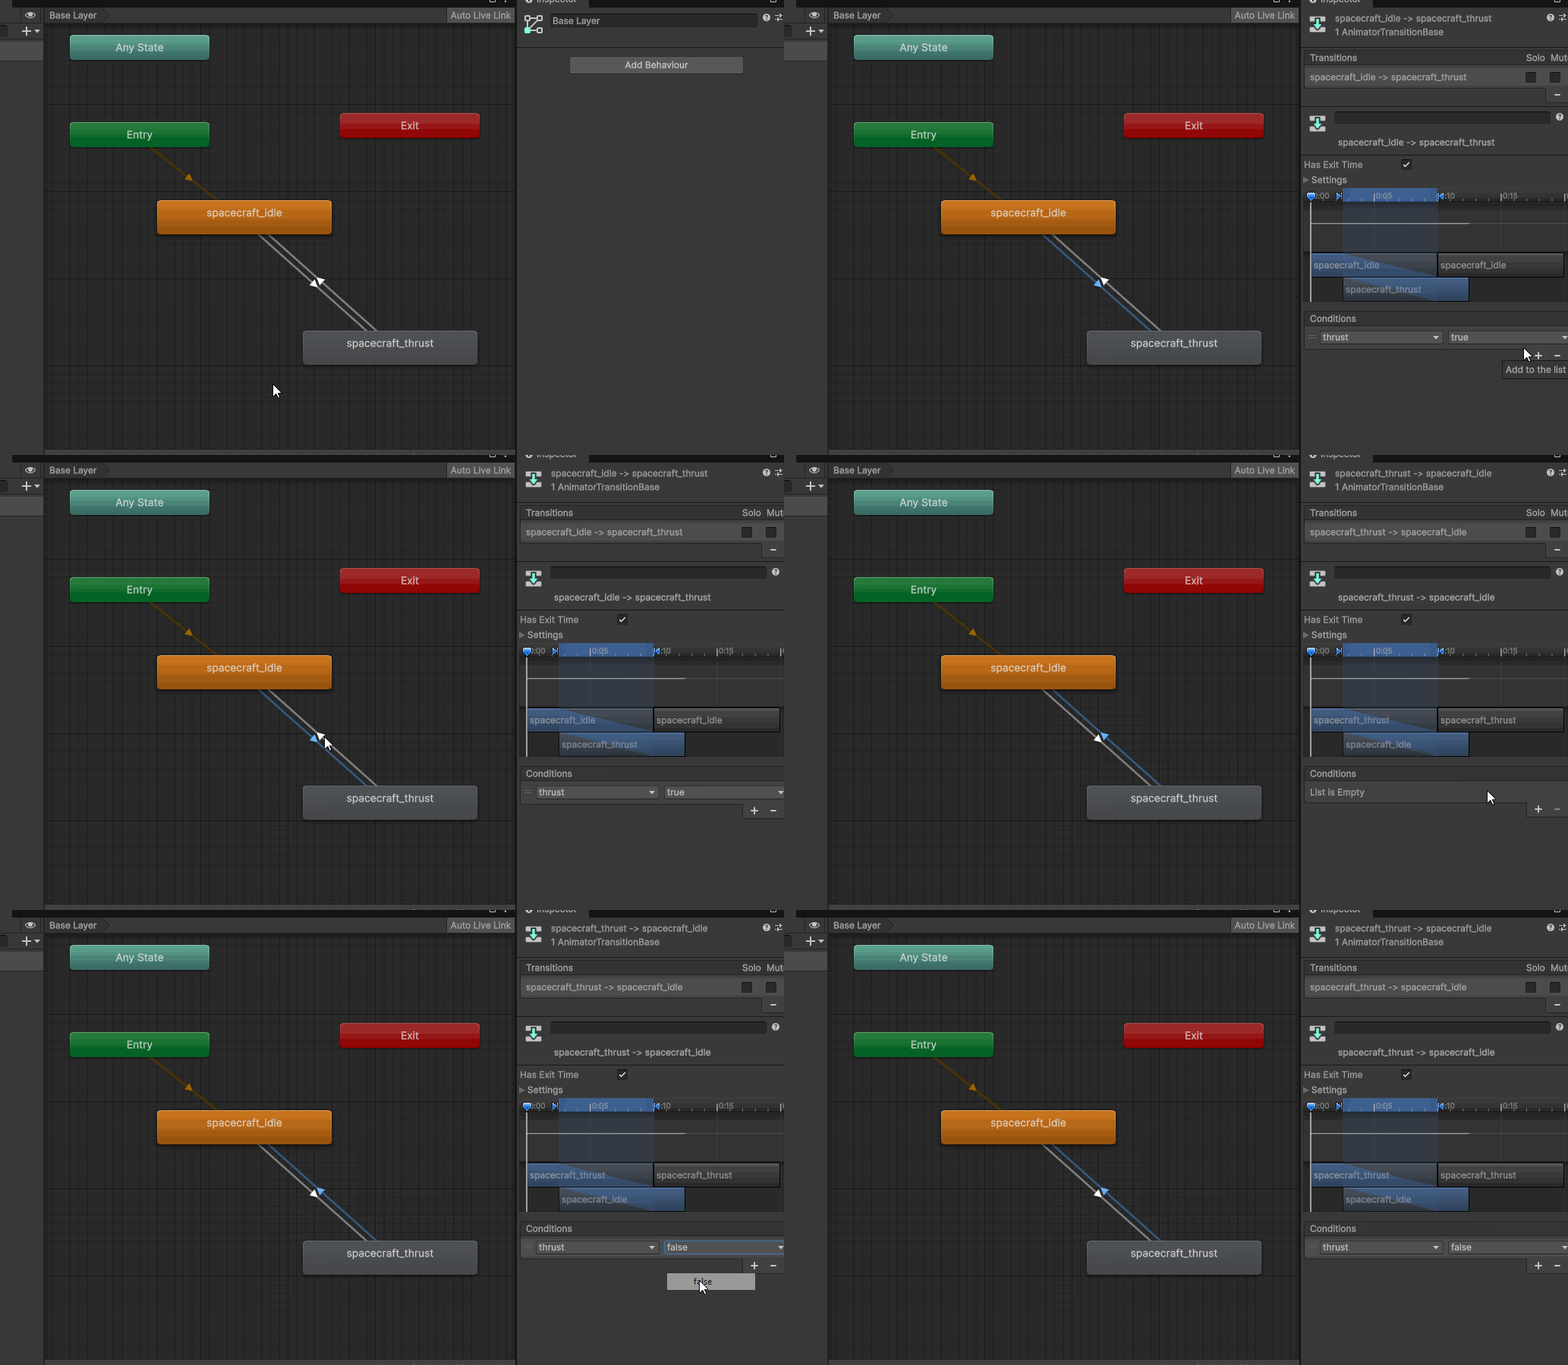
Once we have a parameter, we can then use this parameter to set conditions on our transitions. For this tutorial, let’s use a set of conditions that allow the idle animation to transition to the thrust animation if “thrust” is true and also allow the thrust animation to transition to the idle animation if “thrust” is false.
To create these conditions, we need to select on the transition line and then navigate to the inspector panel. From there, we can press the plus button in the conditions section to add our condition.
Programming Animation States
Once we have our parameters and or conditions, we can then access these parameters in code to change our animation state during runtime.
Let’s write this code within our Spacecraft.cs file (or Player.cs file).
Getting Animator
The first step in this process is getting our Animator. We can begin by creating a variable for our Animator component named anim:
Animator anim;
Next, we can get our Animator either in Start or Awake
void Start()
{
    rBody = GetComponent<Rigidbody2D>();
    sRenderer = GetComponent<SpriteRenderer>();
    //new code
    anim = GetComponent<Animator>();
}
Setting Parameters
With our anim value now assigned. We can now get access to the parameters on our animator controller.
Within this tutorial, we want to change our bool value of “thrust” to true if our player is pressing down the thrust button. To do this, we can check if our moveInput value is greater than 0.
Let’s first create the if and else statement that will check if our player is pressing the move button. We can do this in our FixedUpdate method after assigning the values of moveInput and rotateInput:
void FixedUpdate()
{
    moveInput = moveAction.ReadValue<float>();
    rotateInput = rotateAction.ReadValue<float>();

    if (moveInput > 0)
    {

    }
    else
    {

    }
Setting Values
To set the value of parameter on an Animator, we can use a variety of methods
SetBool()allows us to set boolean parametersSetFloat()allows us to set a float parameterSetInteger()allows us to set an integer parameterSetTrigger()allows us to set a trigger
Within our example, we want to use the SetBool() method on our Animator component to set the value of thrust. As a starting point, we can first call anim.SetBool(); in both our if and else statements:
if (moveInput > 0)
{
    anim.SetBool();
}
else
{
    anim.SetBool();
}
With these methods we need to provide two parameters:
- The name of the bool we want to set as a string
- The value we want to set our bool to (either true or false)
In our case, when a player is the move button, we can set our bool parameter by using anim.SetBool("thrust", true), and when the player is not pressing the move button we can transition back to our idle state by using anim.SetBool("thrust", false):
if (moveInput > 0)
{
    anim.SetBool("thrust", true);
}
else
{
    anim.SetBool("thrust", false);
}
Testing
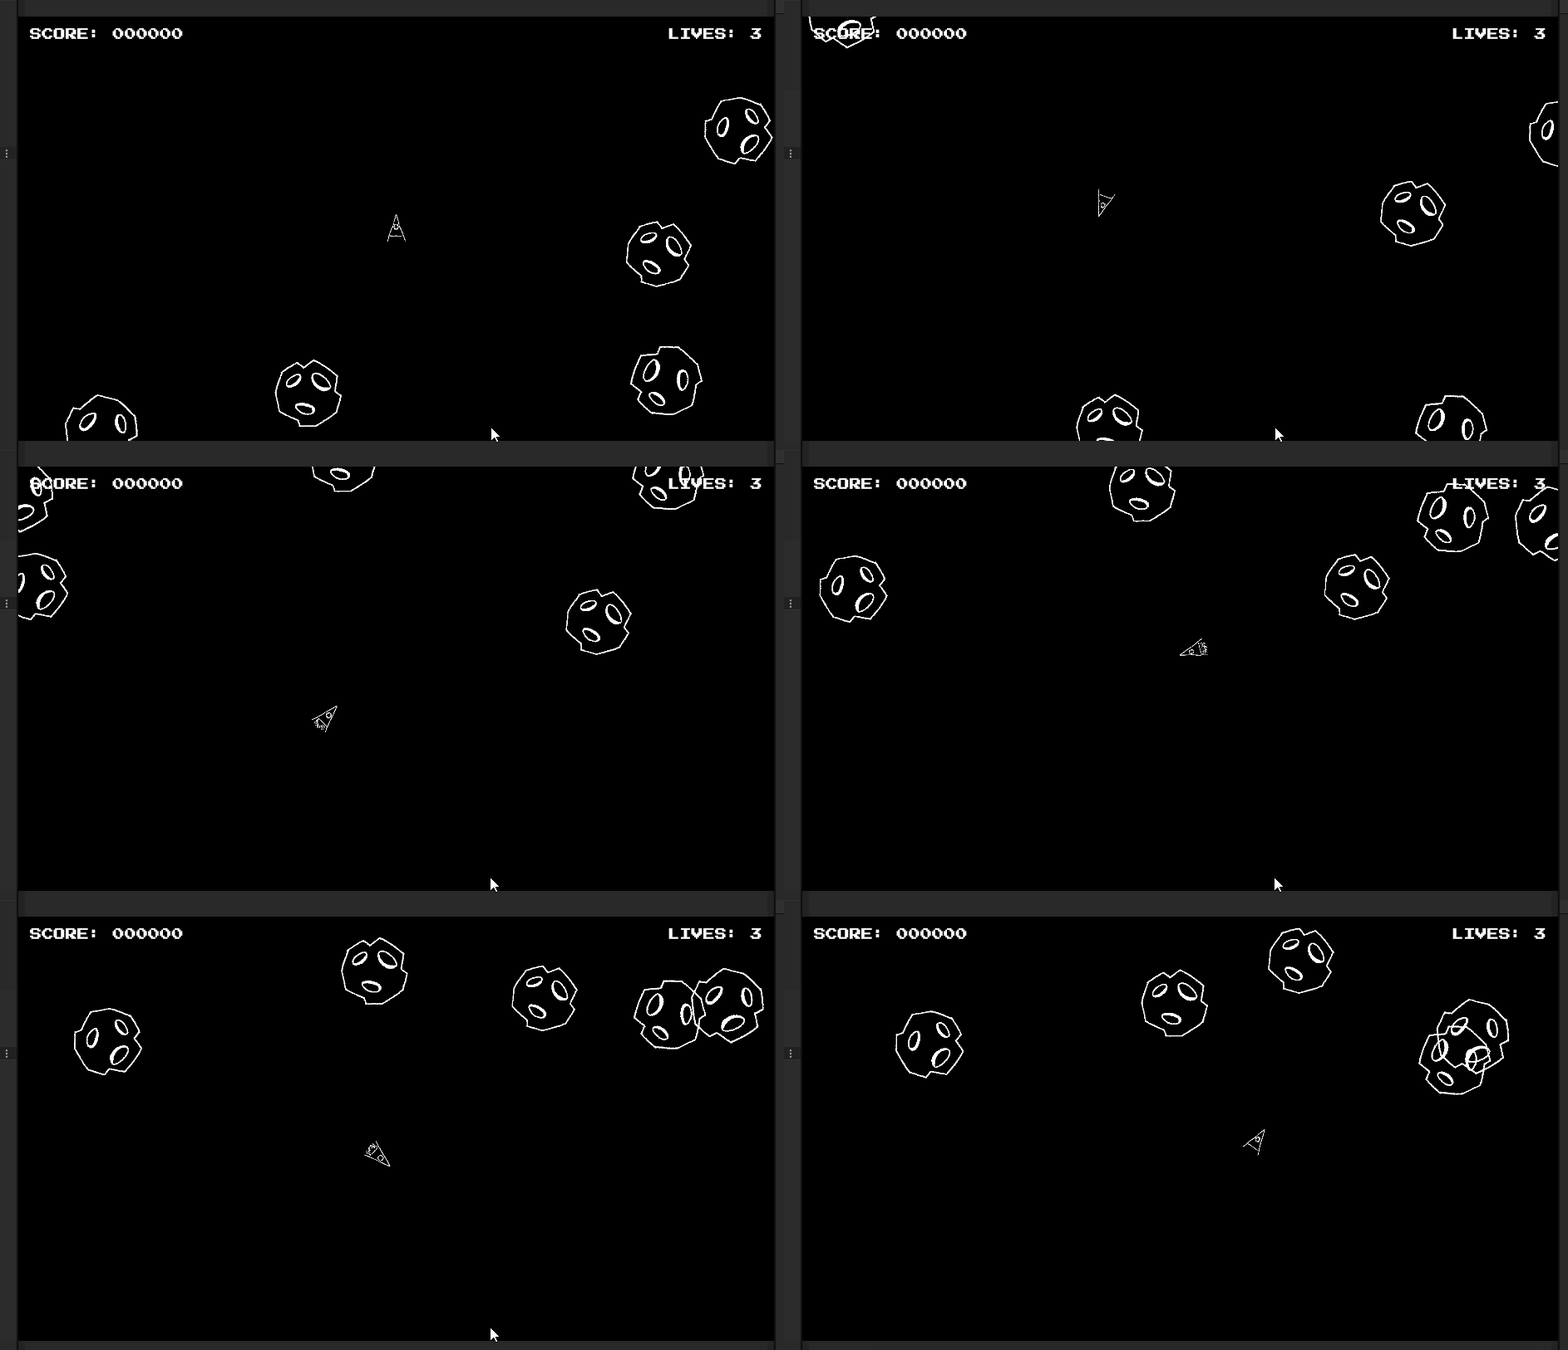
If we play our project, we will notice that there is slight delay when we transition to our thrust animation and back. The reason for this is that Unity, by default, will transition to a new animation based on time value set with our Animator controller.
Exit Time
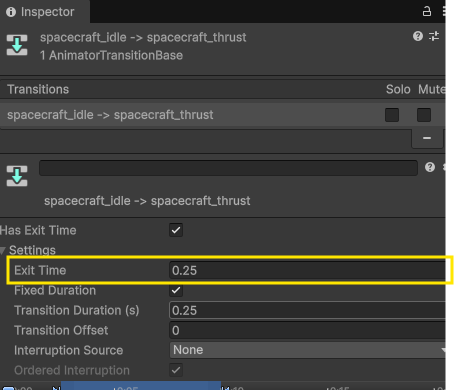
By selecting one of our transitions and looking at our inspector, we can see that our transition has an exit time of .25 seconds. This exit time is giving our transition the slight delay we are seeing during play:
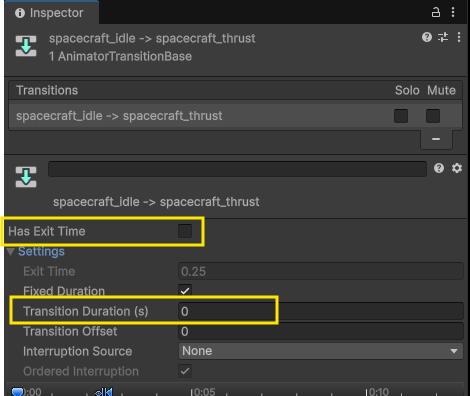
To correct this, let’s uncheck the box Has Exit Time as well as set our Transition Duration to be 0. This will give us an instant transition. Let’s do this for both transitions. You can find the Transition Duration under the setting drop down:
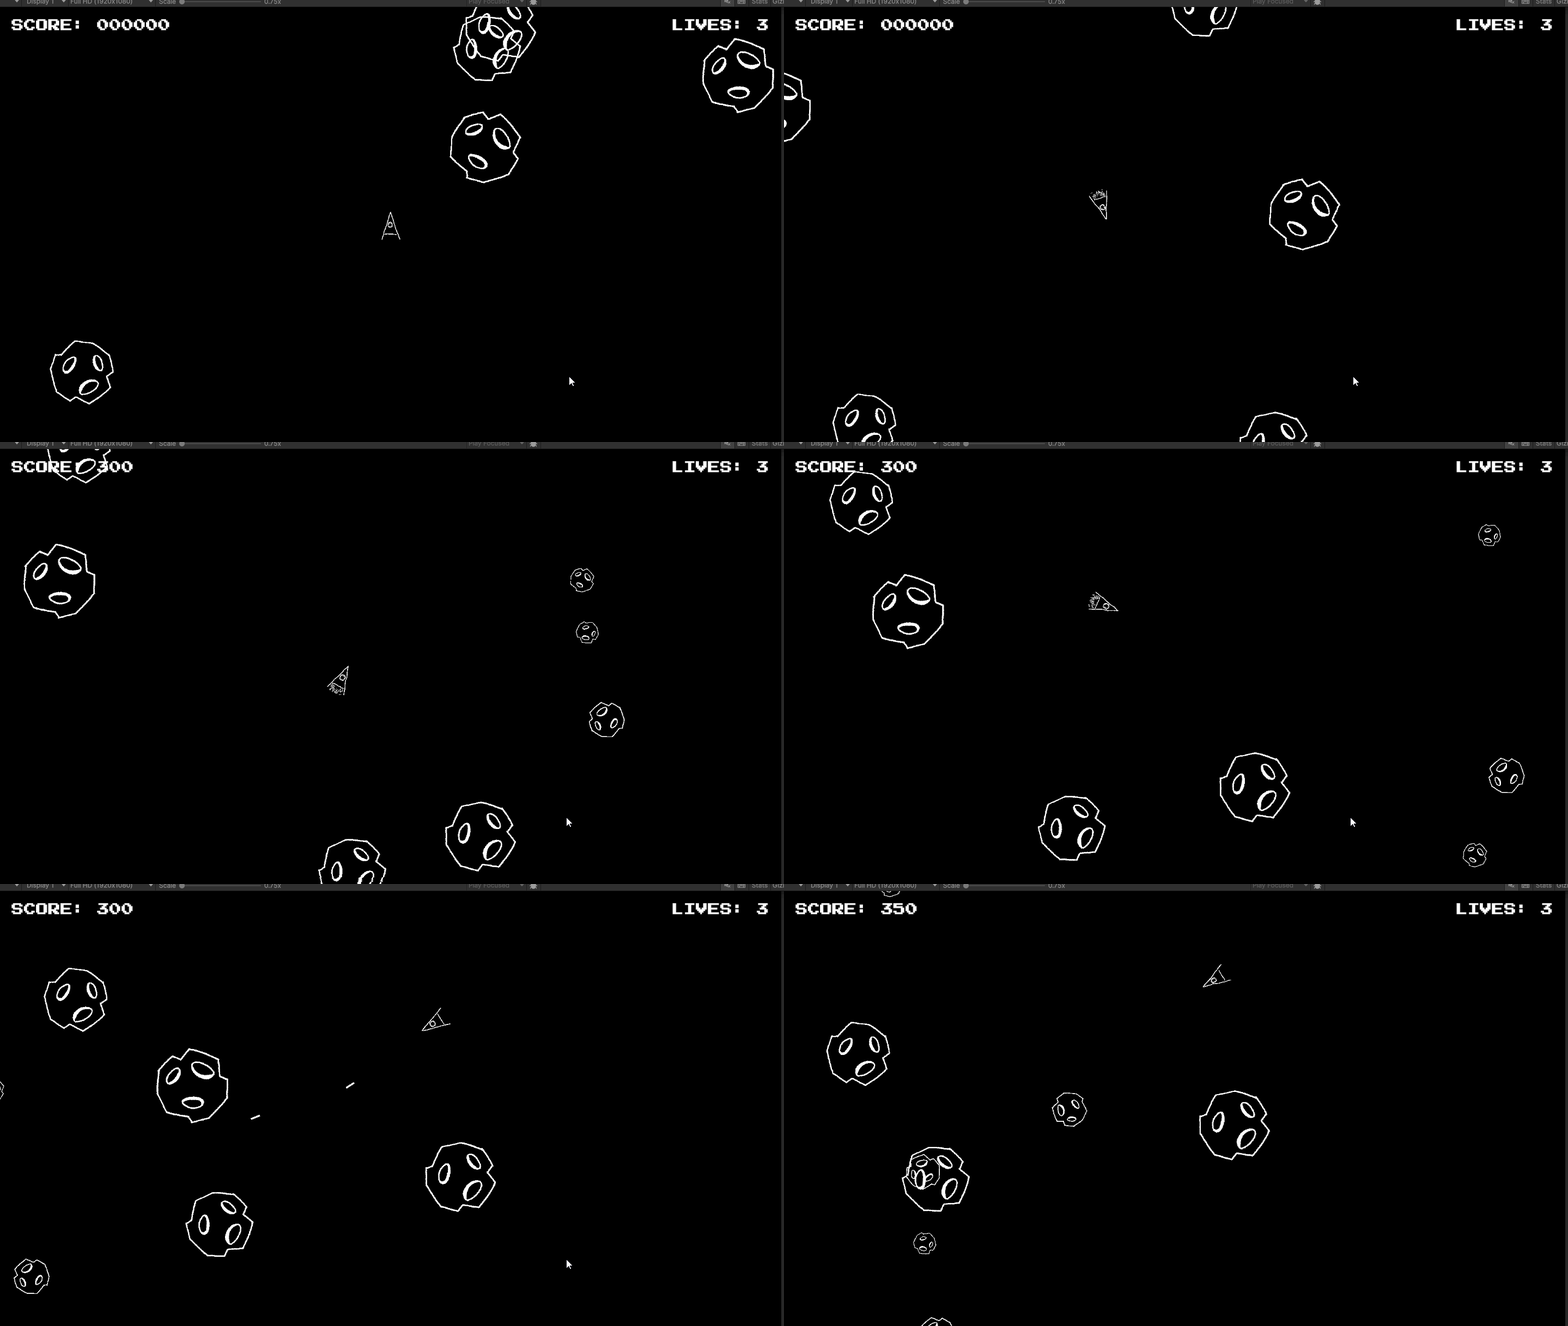
As a result, now when we play our project, we will see an instant transition from idle to thrust:
Challange
Customize the animations within your scene: using software of your choice, create an animation for player destruction and add it to your scene. You may need to add a timer to delay the time by which the player spawns