Sound
In this tutorial, we will be learning the basics of playing and controlling sounds within Unity.
Audio Listener Component
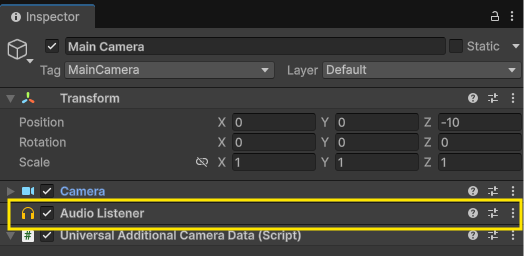
In order for sound to play during your game, there must be an Audio Listener component somewhere within your scene. By default, Camera game objects will be created with an audio listener.
Audio Source
Sound is played in Unity using an Audio Source component. In the first part of this tutorial, let’s add some background music to our scene using an Audio Source:
- Create an Empty Game Object and name it “Music”
- Add a Audio Source component to the empty game object
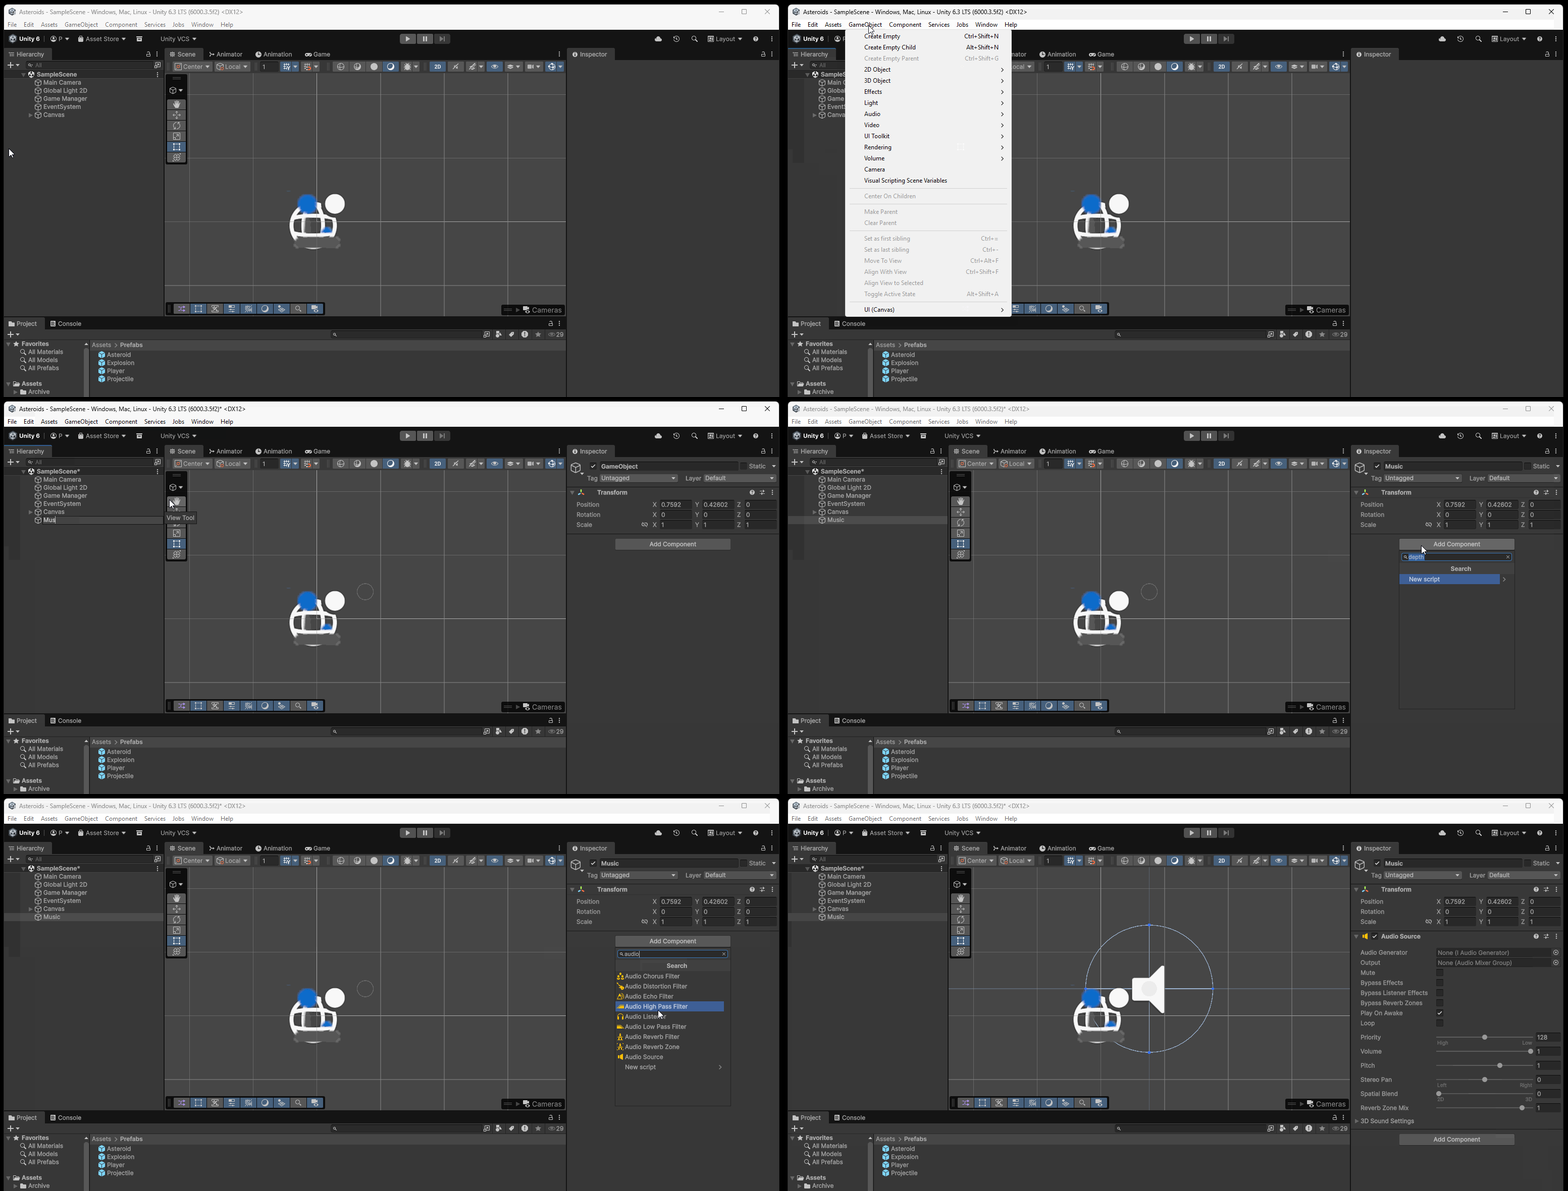
To play background music, we need to check a few settings within our Audio Source component:
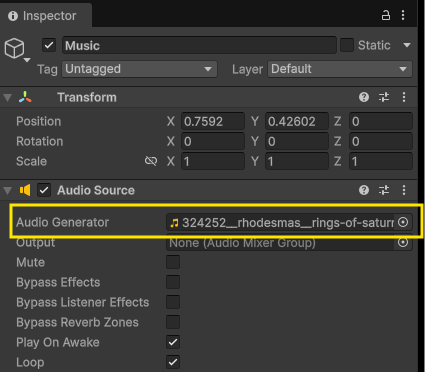
- Play On Awake is enabled, this will cause our audio to play as soon as our game loads
- Loop is enabled, this will allow our audio to loop.
- Lastly, we need an Audio Generator. This is a container that holds audio source, often times an Audio Clip.
To play our background music, we need to have a piece of audio in our scene.
Begin by downloading the following background music clip.
This clip is named Rings of Saturn Music Loop by user rhodesmas. Downloaded from freesound.org
Then, import that audio file into a new folder named “Sounds”
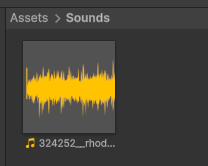
Once our audio is imported, we can drag our audio clip into the Audio Generator property of our Audio Source Component:
Adjusting Audio
Within Unity, we can use a number of options to adjust our audio.
Our Audio Source component allows us to Adjust volume and change the pitch of our audio clips.
Additionally, we can use a variety of components to alter our audio:
- Audio Low Pass Filter
- Audio High Pass Filter
- Audio Echo Filter
- Audio Distortion Filter
- Audio Reverb Filter
- Audio Chorus Filter
Sound Effects
Unlike background music, sound effects are sound clips that play within our scene during particular moments. These are usually triggered by an event in our scene or an input from a player.
Asteroid destruction sound effect
One option for sound effects is to play them once by disabling the Loop parameter on an audio source.
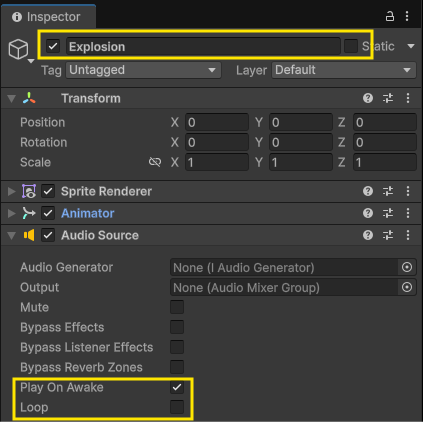
For example, on our Explosion prefab we could add and Audio source and make sure that Play on Awake is enabled, and Loop is disabled:
We can then download and import this sound:
Short Explosion 1 by AceOfSpadesProduc100 downloaded from FreeSound.org:
If we then drag our audio clip into our Explosion Audio Generator parameter, we can then hear the audio clip play when our Explosion prefab is instantiated.
Play One Shot
Another option for playing audio clips is to use the method PlayOneShot() on an Audio Source component. This method allows you to swap out the audio clip you are playing with a different value. This is a particularly good method to use if you have many audio clips that need to play on the game object. For example, if you have a player that has a jump sound, an action sound, and a walk sound, you could store these audio clips as variables and use the PlayOneShot() method to play these clips.
In this tutorial, let’s write some code to get a laser beam sound to play when our player fires a projectile.
As a first step, let’s download the following sound and place it in our sound folder:
Laser Shot 3 by DominikBraun downloaded from FreeSound.org:
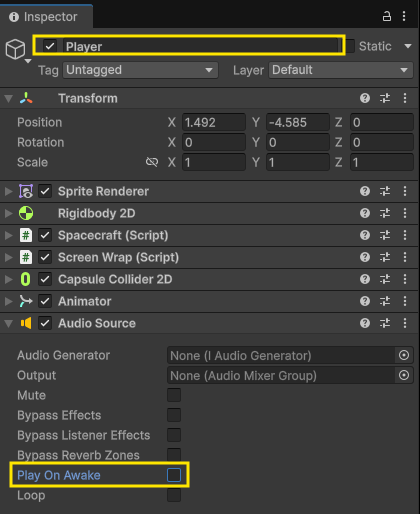
Next, let’s make sure our Player prefab has an Audio Source component, and that Play on Awake is disabled:
Editing Player Script
Next, let’s edit our player script. Begin by opening your Spacecraft.cs file (or Player.cs file if that is what you named it).
Let’s begin by adding two variables. We can add a public variable to store our Audio Clip as well as a private variable to store our Audio Source. When storing a piece of audio in Unity, we can use an AudioClip data type:
public AudioClip projectileSound;

AudioSource playerAudio;
Next, let’s assign our Audio Source in our Start() or Awake() method using GetComponent<>():
void Start()
{
    playerAudio = GetComponent<AudioSource>();

//... rest of code
Finally, within our Update() loop, we can look at the if statement in which our projectile is being fired and then call PlayOneShot() on our playerAudio Audio Source. We need to provide our PlayOneShot() method with an Audio Clip; we can provide the method with the value of our projectileSound variable:
void Update()
{
    if (fireAction.triggered)
    {
        playerAudio.PlayOneShot(projectileSound);

//...rest of code
If we then assign Projectile Sound property on our Player prefab with the value of our imported audio clip:
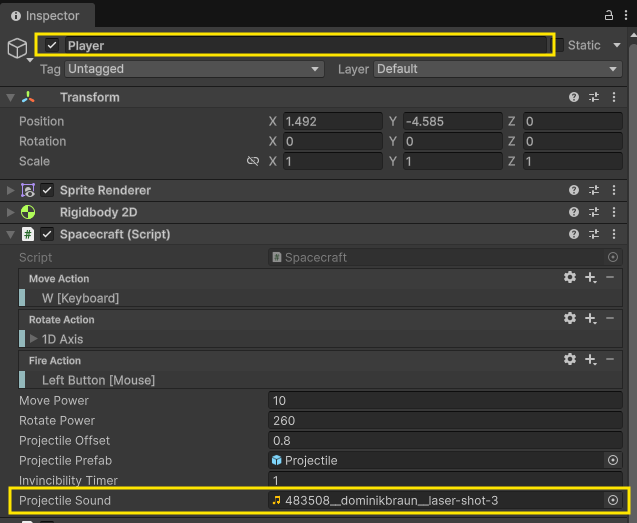
Now, when we play our game, our projectile sound will play.
At the end of this tutorial, our game should sound like this: